Printer Installation Guide - (Mac Leopard)
If you need to substitute the configuration file of an already installed printer, you have to remove the old configuration file of this printer on you laptop. Please read the page: How to uninstall an old Sissa network printer configuration on your Mac (leopard)
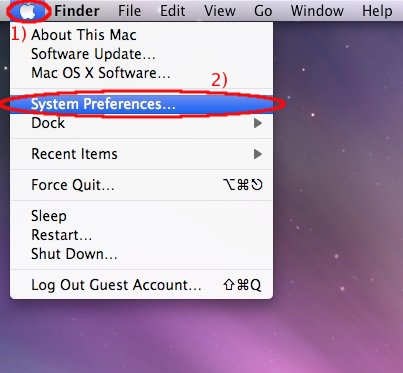
a) On the menu located at the top of the window:
- 1) click on the Apple menu, then
- 2) select System Preferences.
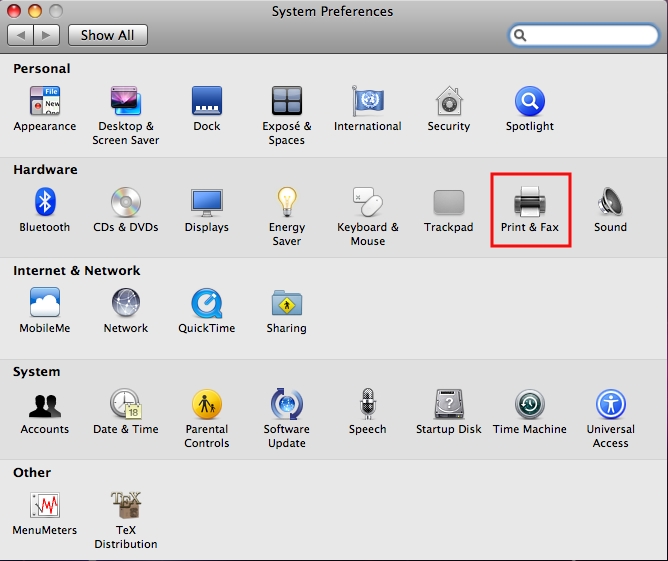
b) In the System Preferences window:
please look for Hardware section, then click on the Print & Fax icon.
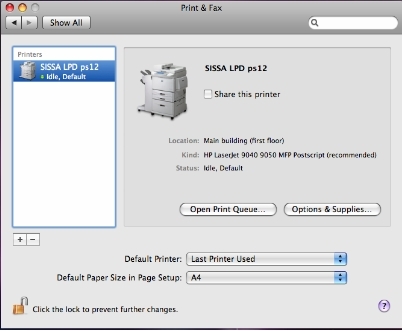
c) In the Print & Fax window:
- 1) make sure you have the authorization to proceed (the lock has to be open);
- 2) click on the Plus “ + ” sign.
- 1) Click on the Default icon on the top of the window;
- 2) then on the Printer name section select the name of the printer
g)
- 1) Search for the downloaded description file (for example ps12.ppd) and select it;
- 2) Click on Open to load the printer description.
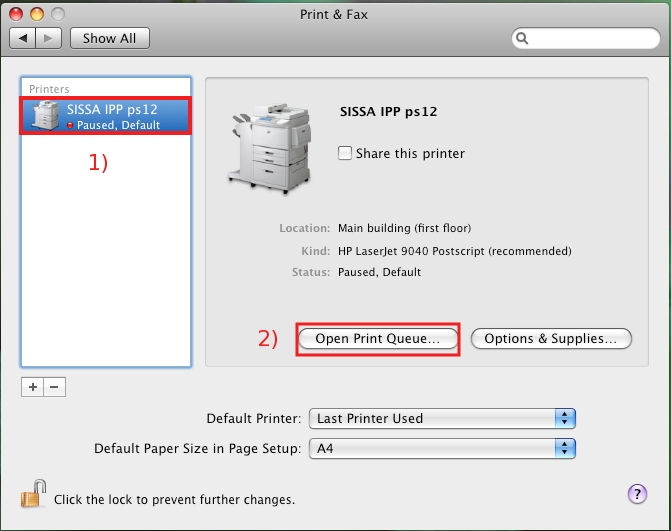
j1)
- Select 1) the paused printer on the printer section on the right;
- then 2) click on Open Print Queue.
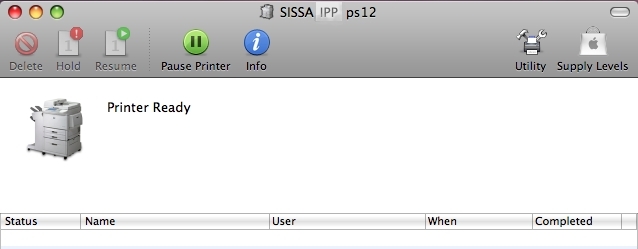
j2) In the print queue window (for example SISSA IPP ps12) click on the Resume Printer icon.
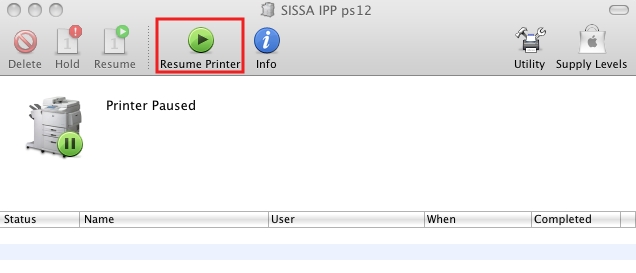
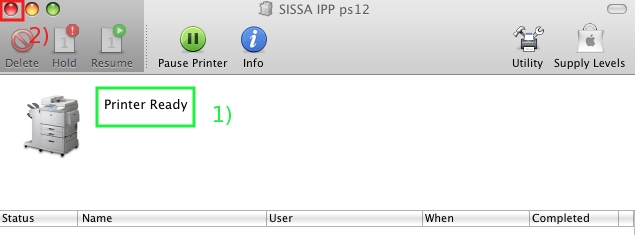
j3) In the print queue window (for example SISSA IPP ps12):
- 1) make sure that the printer is ready;
- 2) then close the window.
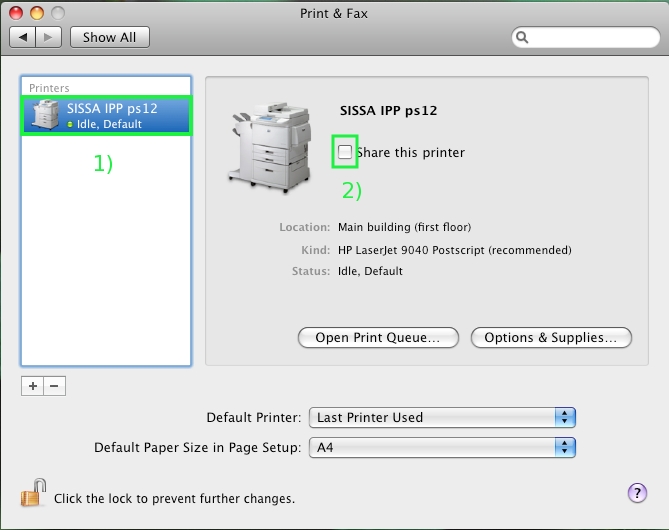
item k)
k) In the Print & Fax window:
- 2) make sure that the box Share this printer is not checked.
To print a test page
l) If you want to print a test page:
- 1) Select the printer on the printer section on the right;
- 2) then click on Open Print Queue.
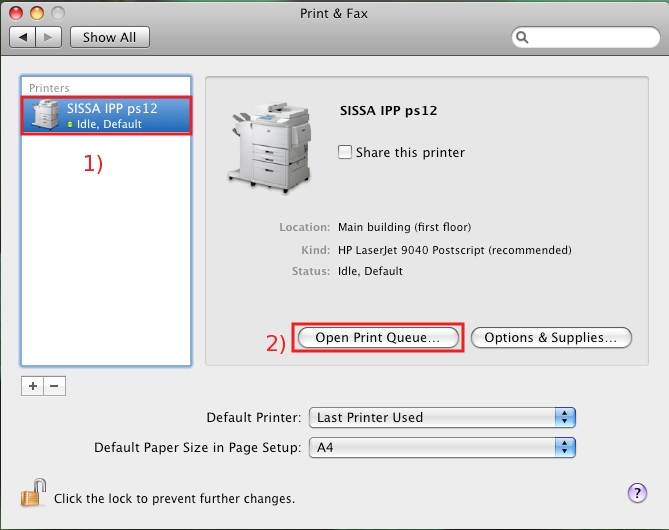
m) The window (for example SISSA IPP ps12) will appear… please ignore it… for the moment..
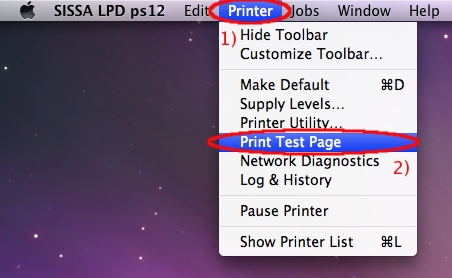
n) On the menu located at the top of the desktop window:
- 1) click on the Printer menu, then
- 2) select Print Test Page.

