SISSA-WiFi Windows Xp configuration guide
Configuration guide to the SISSA-WiFi Wireless Network, using the default tools and drivers of Microsoft Windows XP Service Pack 3.
On Windows Xp Service Pack 2, you need to install the following patch to use the Wpa 2 security protocol.
How to check the service pack version on Windows XP to use wireless.
Before starting check the wireless network card driver and update it to the latest version. See the web
site of your card's manufacturer.
a) Switch on your wireless network card, then in the Notification area (bottom-right corner of the Desktop) a pop-up window will appear:
click on the Wireless Network icon to open a Wireless Network Connection.

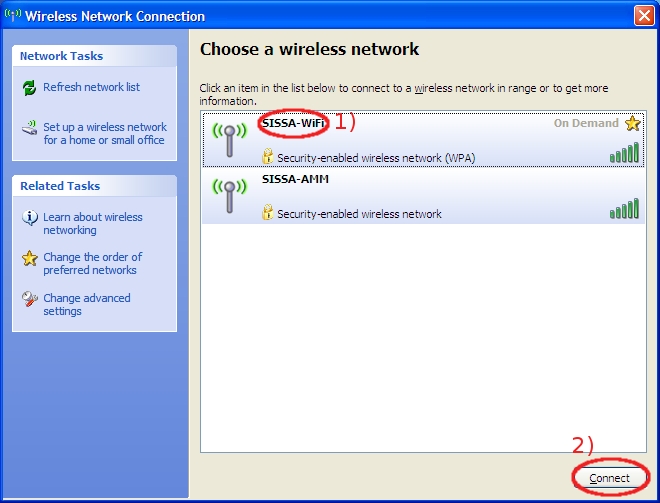
b) In the Wireless Network Connection window:
- 1) select SISSA-WiFi;
- 2) click on Connect.
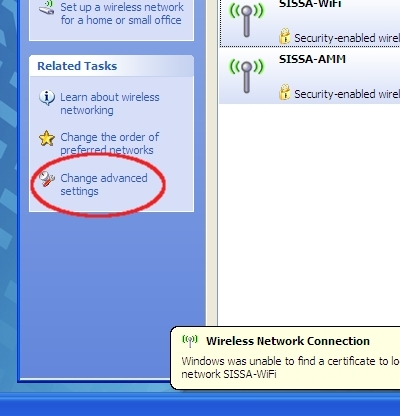
c) In the Wireless Network Connection window:
after a while, in Related Tasks section, click on Change Advanced Settings.
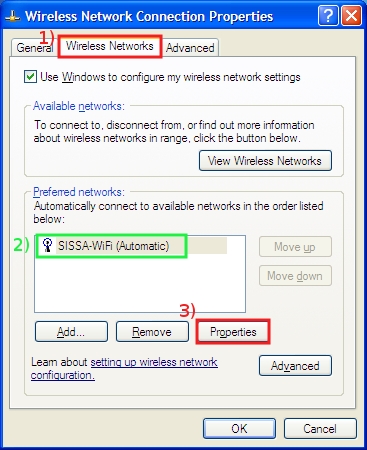
d) In the Wireless Network Connection Properties window:
- 1) select Wireless Networks tab;
- 2) verify that in the Preferred networks: section there appears SISSA-WiFi;
- 3) click on Properties.
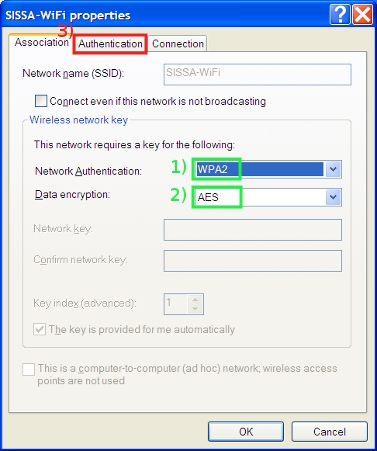
e) In the SISSA-WiFi properties window:
- 1) verify that in the Network Authentication: drop down list WPA2 is selected;
- 2) verify that in the Data ecryption: drop down list AES is selected;
- 3) then click on the Authentication tab.
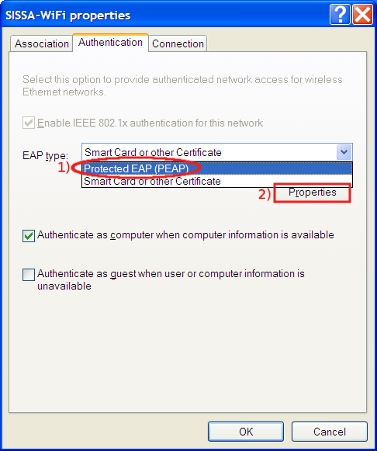
f) In the SISSA-WiFi properties window:
- 1) in the EAP type: drop down list select Protected EAP (PEAP);
- 2) and then click on Properties.
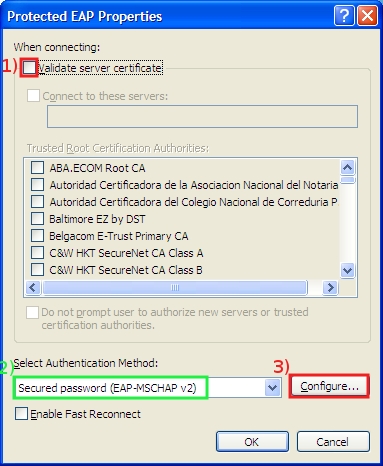
g) In Protected EAP Properties window:
- 1) remove the check in Validate server certificate box;
- 2) verify that in Select Authentication Method drop down list Secured password (EAP-MSCHAP v2) is selected;
- 3) click on Configure….
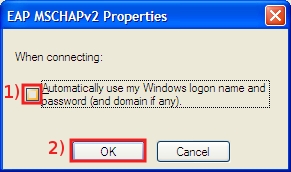
h) In EAP MSCHAPv2 Properties window:
- 1) remove the check in Automatically use my Windows logon name and password box;
- 2) click OK on this window and also in the Protected EAP Properties window (step g).
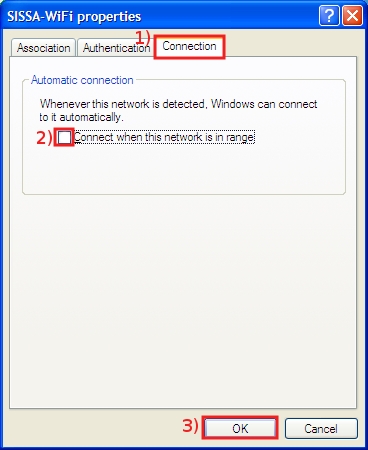
i) In the SISSA-WiFi properties window:
- 1) select Connection tab;
- 2) remove the check in the Connect when this network is in range box;
- 3) then click OK here and on ALL windows in order to save and confirm all settings.
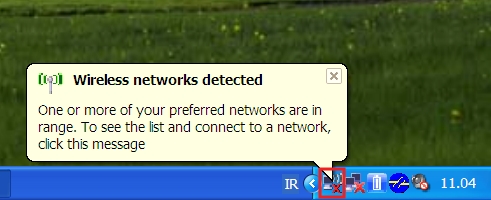
j) In the Notification area (bottom-right corner of the Desktop) there will appear a pop-up window (if you are in the SISSA wireless range, the message “ Wireless networks detected ” will appear):
click on the Wireless Network icon to open Wireless Network Connection.
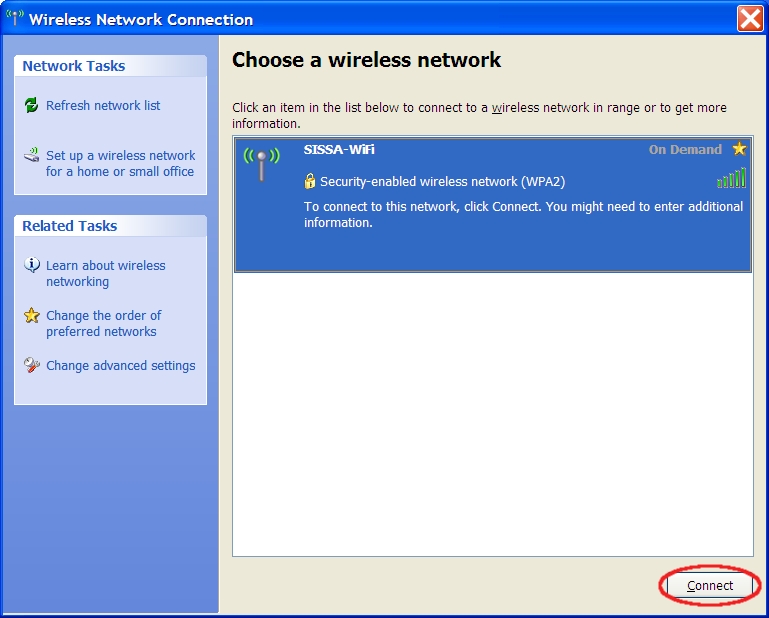
k) In the Wireless Network Connection window:
select SISSA-WiFi and click on Connect.
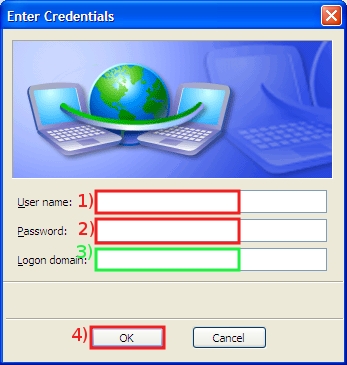
l) In the Enter Credentials window:
- 1) in the User name: field insert your your SISSA username
- 2) and the Password: field insert your SISSA password
- 3) leave the Logon domain: field empty;
- 4) then click OK.
