This is an old revision of the document!
ROUNDCUBE - Forward & Vacation filters
Your e-mail filters
Available on this page about Roundcube:
FORWARD
DO NOT USE ANYMORE the .forward file created under your HOME directory
To SET an automatic forward address use WEBMAIL ONLY.
Create your forward rule
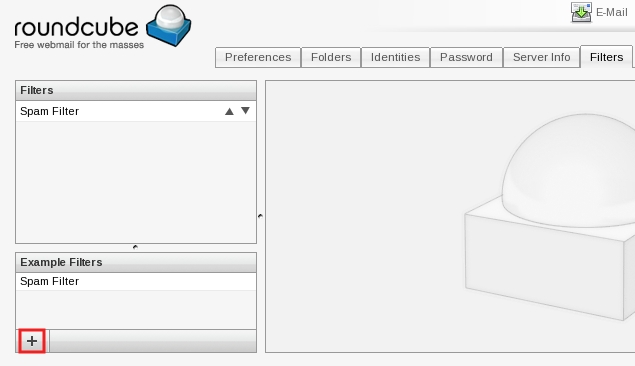
c) Select Filters tab.

d) Click on the cross located on the left bottom in the Example Filters section.
e)
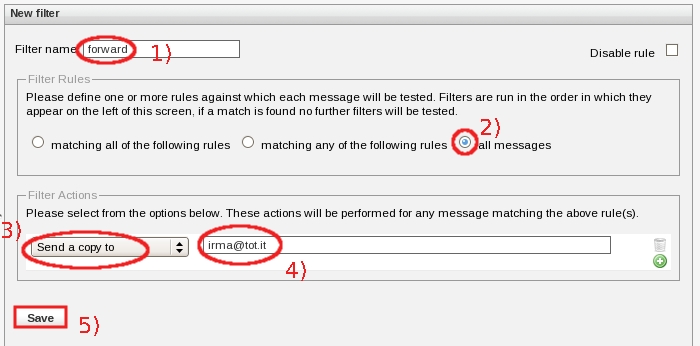
- 1) Write in the Filter name field a rule name (in the example forward);
- 2) in the Filter Rules section, put a check in the all messages box;
- 3) in the Filter Actions section, in the drop down list select Send a copy to (please note: to redirect all incoming mails to another e-mail address without keeping a copy in your SISSA Inbox, in this drop down list select Redirect message to);
- 4) in the following field write the e-mail address where you wish to redirect your incoming e-mail (for example irma@tot.it);
- 5) then click on Save.
f) The roundcube webmail service will inform you that “ Filter saved successfully ”.
Please note: in the Filter section on the left of the window, your new forward rule will appear.

Disable/re-enable forward
How to disable/re-enable a forward rule previously created.
Disable forward
d) disable-forward:
In the Filters section on the left, select your forward rule (in the example forward).

e) disable-forward:
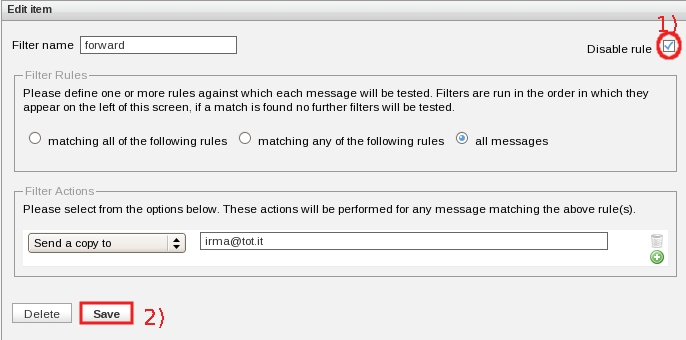
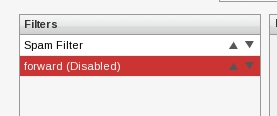
- 1) put a check in the Disable rule box on the right;
- 2) then click on Save.
f) disable-forward: The roundcube webmail service will inform you that “ Filter saved successfully ”. Please note: in the Filter section on the left of the window, your forward rule will appear : (Disabled) “.
Re-enable forward
d) re-enable-forward:
In the Filters section on the left, select your forward rule (in the example forward).

e) re-enable-forward:
- 1) remove the check in the Disable rule box on the right (by clicking in it);
- 2) then click on Save.
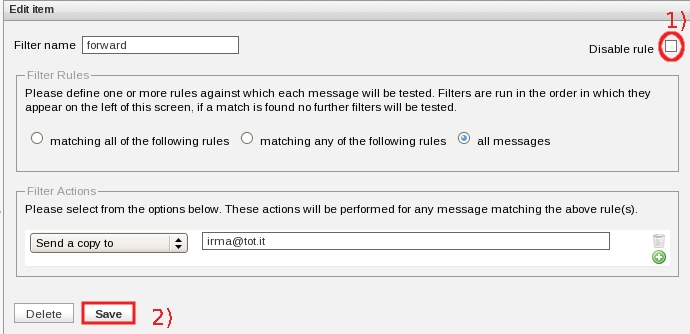
e) re-enable-forward:
The roundcube webmail service will inform you that ” Filter saved successfully “. Please note: in the Filter section on the left of the window, your forward rule will appear without ” (Disabled) “ now.

Change your forward rule
You can change the content of your forward rule, independently of whether the rule is enabled or disabled.
In the following example we use an enabled forward rule.
c) Select Filters tab.

d) In Filters section, click on your forward rule name (in the example forward).

e)
- 1) In the following example, we are changing the e-mail address to where the incoming e-mails are redirected (in the example irma@mir.it);
- 2) then click on Save.
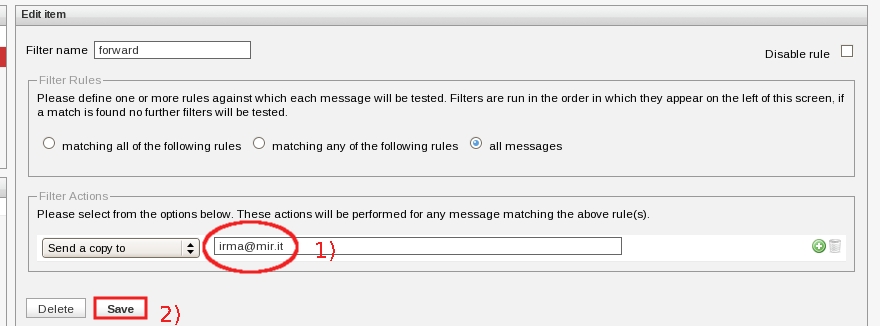
f) The roundcube webmail service will inform you that ” Filter saved successfully ”.

VACATION
Create your vacation rule
c) Select Filters tab.

d) Click on the cross located on the left bottom in the Example Filters section.

e)
- 1) Write in the Filter name field a rule name (in the example vacation);
- 2) in the Filter Rules section, put a check in the all messages box;
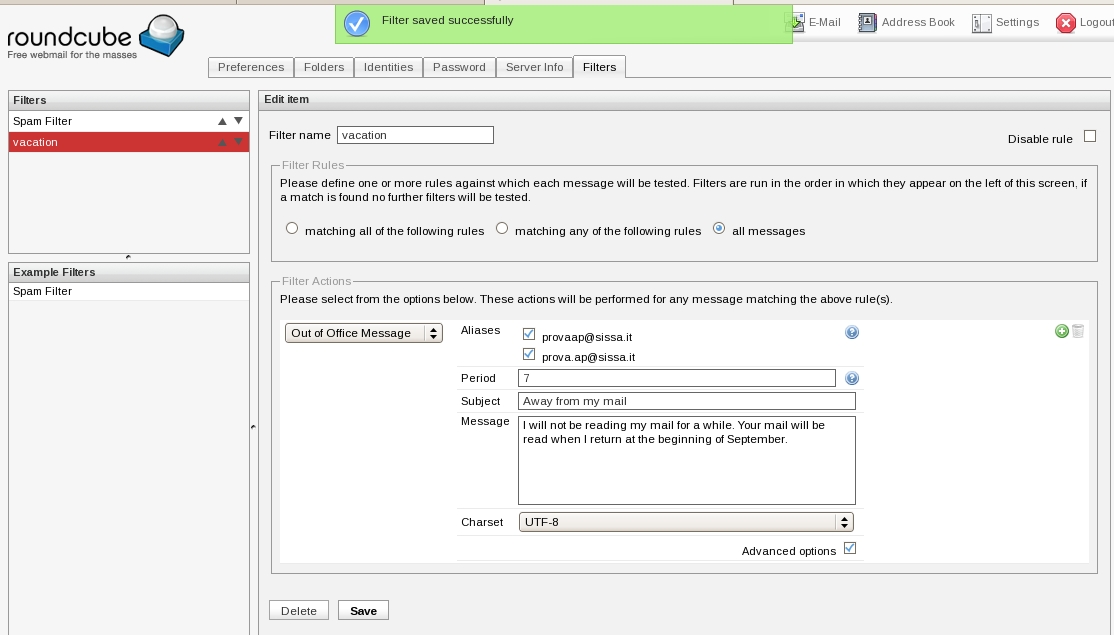
- 3) in the Filter Actions section, in the drop down list select Out of Office Message, then the right side of this section will change:
- we suggest you to keep the default settings of the fields Aliases and Charset;
- change the content of the fields Period, Subject, Message depending on your needs;
- 5) then click on Save.
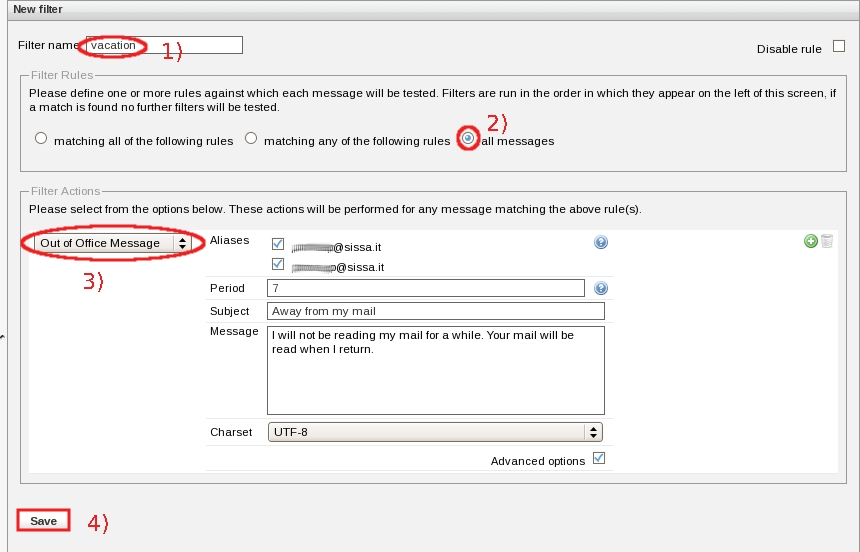
f) The roundcube webmail service will inform you that ” Filter saved successfully “.
Please note: in the Filter section on the left of the window, your new vacation rule will appear.
Disable/re-enable vacation
How to disable/re-enable vacation a rule previously created.
Disable vacation
d) disable-vacation:
In the Filters section on the left, select your vacation rule (in the example vacation);

e) disable-vacation:
- 1) In the Filters section on the left, select your vacation rule (in the example vacation);
- 2) put a check in the Disable rule box on the right;
- 3) then click on Save.
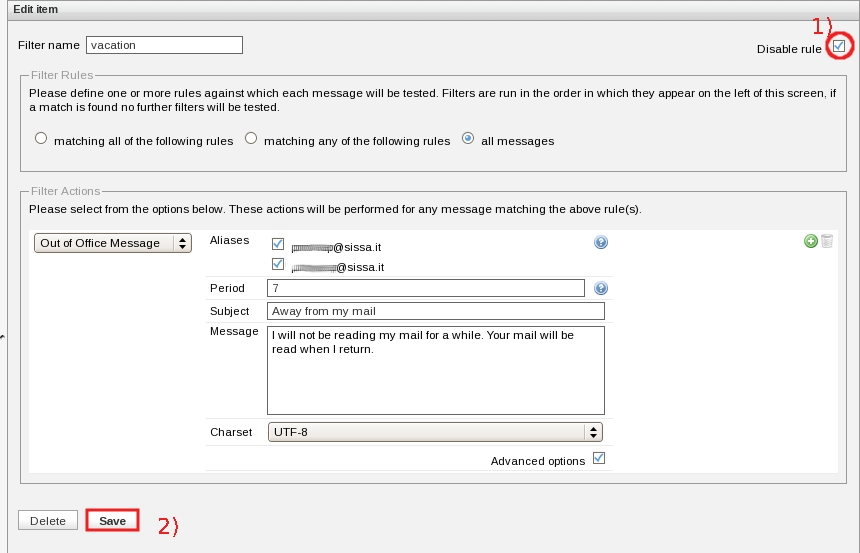
f) disable-vacation: The roundcube webmail service will inform you that ” Filter saved successfully “. Please note: in the Filter section on the left of the window, your vacation rule will appear ” (Disabled) “ .

Re-enable vacation
d) re-enable-vacation:
In the Filters section on the left, select your vacation rule (in the example vacation);

d) re-enable-vacation:
- 1) remove the check in the Disable rule box on the right (by clicking in it);
- 2) then click on Save.
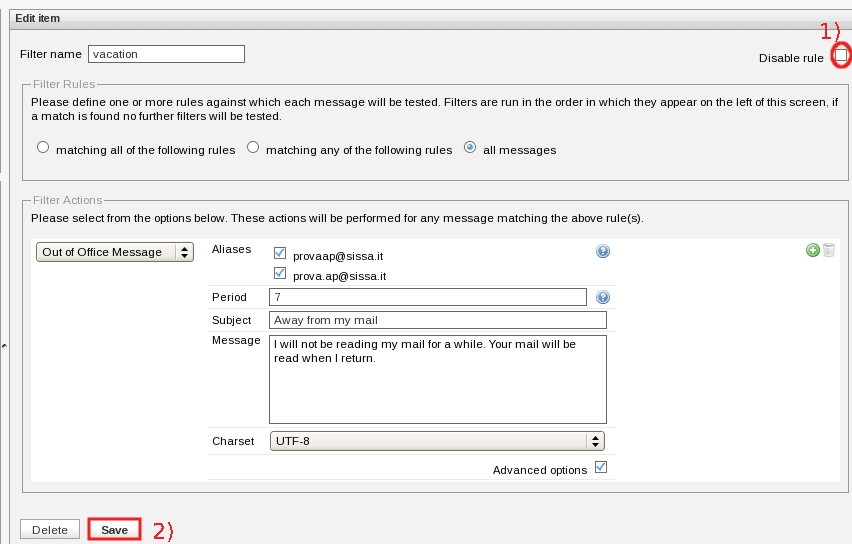
e) re-enable-vacation:
The roundcube webmail service will inform you that ” Filter saved successfully “. Please note: in the Filter section on the left of the window, your vacation rule will appear without ” (Disabled) “ now.
Change your vacation rule
You can change the content of your vacation rule, independently of whether the rule is enabled or disabled.
In the following example, we use an enabled vacation rule.
c) Select Filters tab.

d) In Filters section, click on your vacation rule name (in the example vacation).
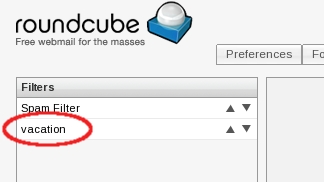
e)
- 1) in the Filter Actions section:
- we suggest to keep the default settings of the fields Aliases and Charset;
- change the content of the fields Period, Subject, Message depending on your needs (in the example we are changing the content of the Message field);
- 2) then click on Save.
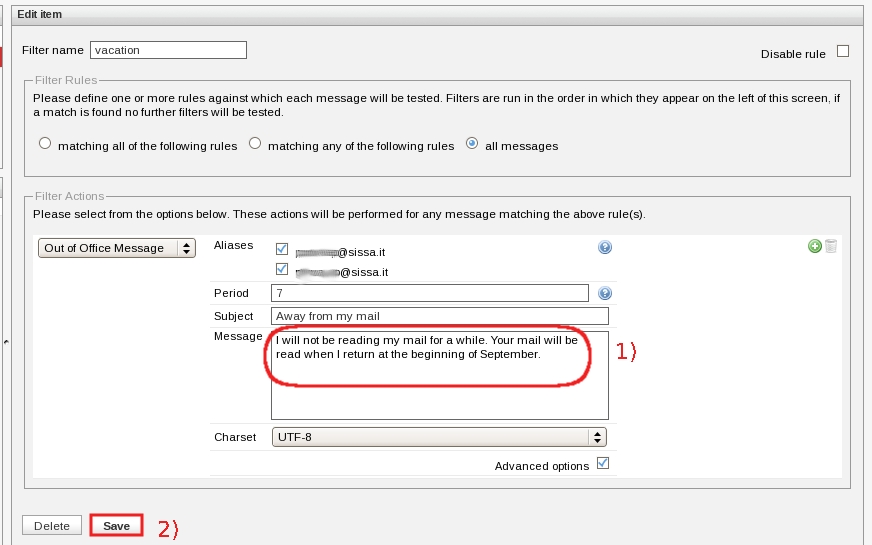
f) The roundcube webmail service will inform you that ” Filter saved successfully ”.
