This is an old revision of the document!
You can follow this instruction, **only** if you have already followed the instructions on the page:\\
[[thunderbird:e-mail_clients:configuration|How to configure Thunderbird to use Sissa e-mail services (first part)]]
How to complete Thunderbird configuration on Linux and using Thunderbird 2.x
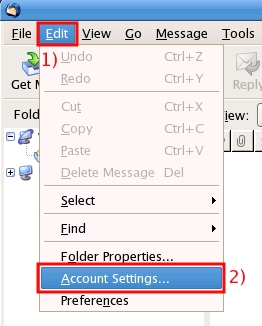
a) On the main thunderbird window:
- 1) in the top of the window click on the Edit menu;
- 2) then click on Account Settings.

b) In the Account Settings window, Work Account section: click on Server Settings.

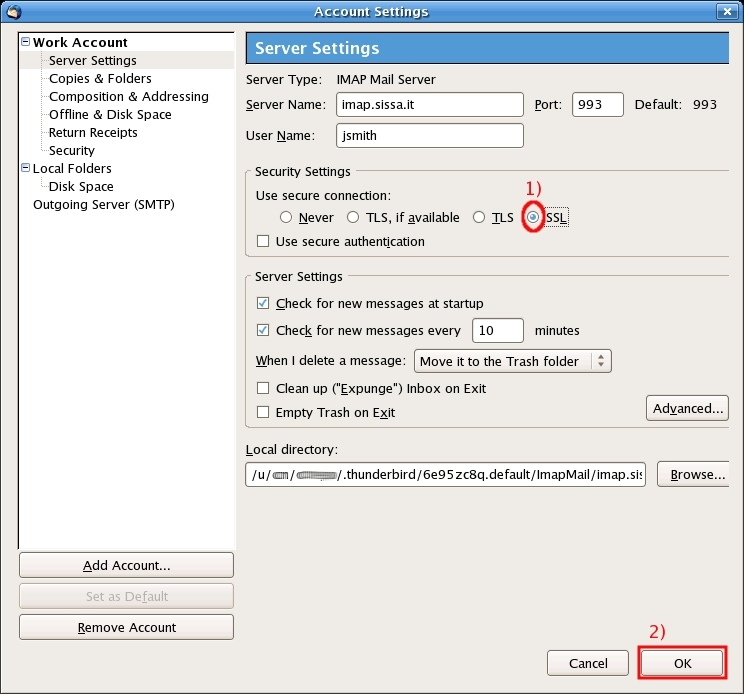
c) In the Account Settings window, Server Settings section:
- 1) put a check in the SSL box;
- 2) then click on OK.

d) On the main thunderbird window:
- 1) in the top of the window click on the Edit menu;
- 2) then click on Account Settings.

e) In the Account Settings window: click on Outgoing Server (SMTP).

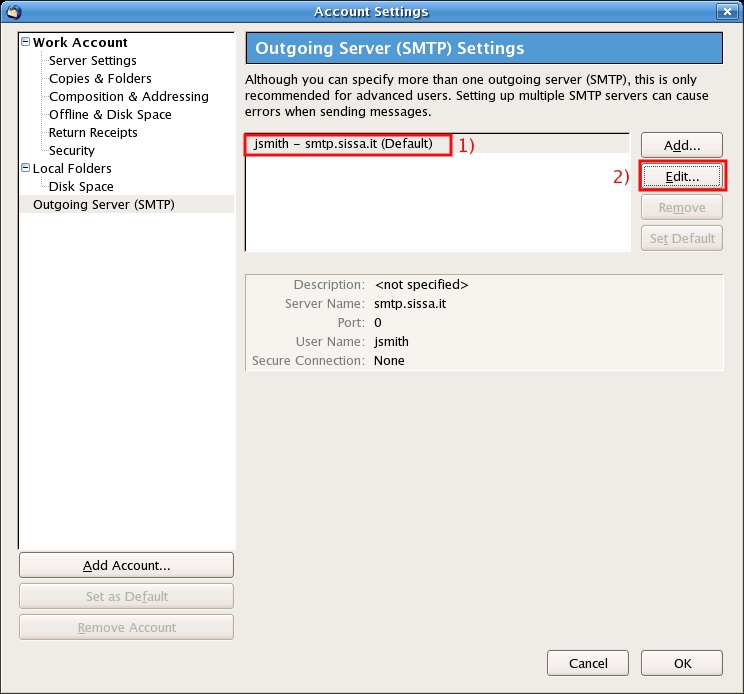
f) In the Account Settings window, Outgoing Server (SMTP) Settings section:
- 1) Select the created Account (for example jsmith - smtp.sissa.it (Default))
- 2) then click on Edit….
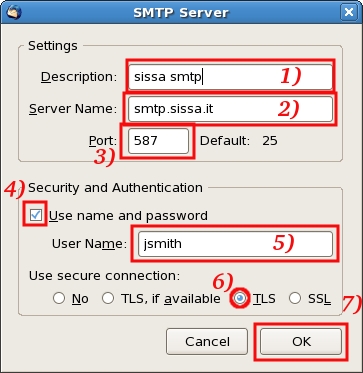
- in the Settings section:
- 1) in the Description: field write a name (for example sissa smtp);
- 2) in the Server Name: field verify it is written smtp.sissa.it
- 3) in the Port: field write 587
- in the Security and Authentication section:
- 4) put a check in the Use name and password box;
- 5) in the User name: field write your SISSA username (for example jsmith);
- 6) put a check in the TLS box;
- 7) then click on OK.

