This is an old revision of the document!
DO NOTE READ THIS PAGE ... WORK IN PROGRESS \\
sissa username
How to configure Thunderbird to use Sissa e-mail services
The configuration have to be done the first time you run thunderbird
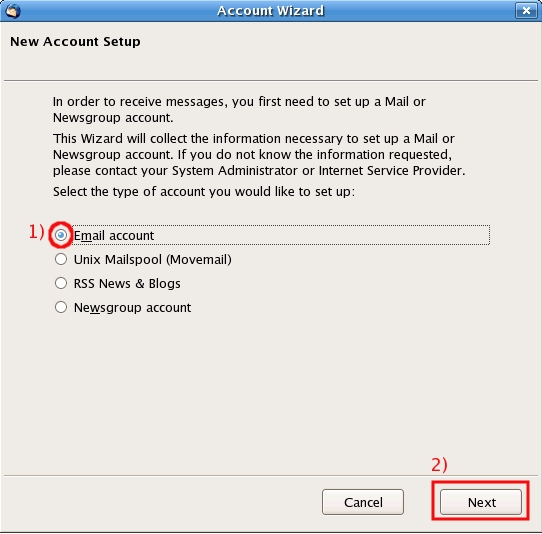
a) In the Account Wizard window, New Account Setup section:
- 1) put a check in the Email account box,
- 2) then click on Next (Continue on Mac).
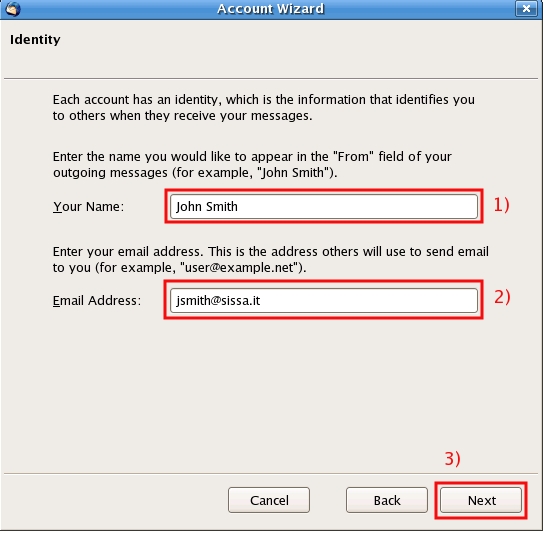
b) In the Account Wizard window, Identity section:
- 1) In the Your Name field, enter your name (for example John Smith),
- 2) In the Email Address field, enter your email address. (for example jsmith@sissa.it),
- 3) then click on Next (Continue on Mac).
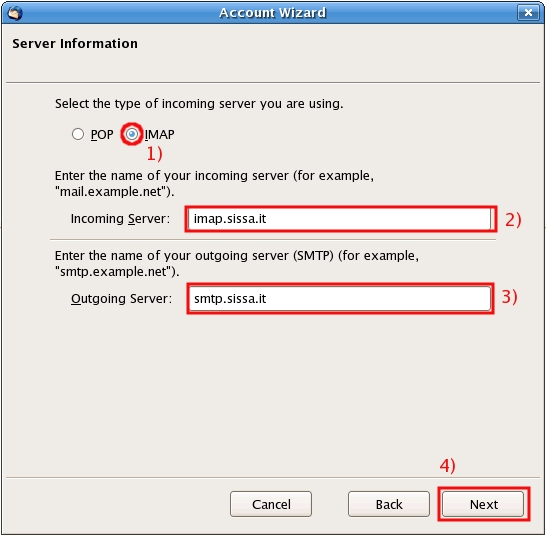
c) In the Server Information section:
- 1) put a check in the IMAP box,
- 2) write imap.sissa.it in the Incoming Server field,
- 3) write smtp.sissa.it in the Outgoing Server field,
- 4) click on Next (Continue on Mac).
d) In the Account Wizard window, User Name section:
- 1) In the Incoming User Name field, write your SISSA user name (for example jsmith),
- 2) leave the Outgoing User Name field blank ,
- 3) click on Next (Continue on Mac).

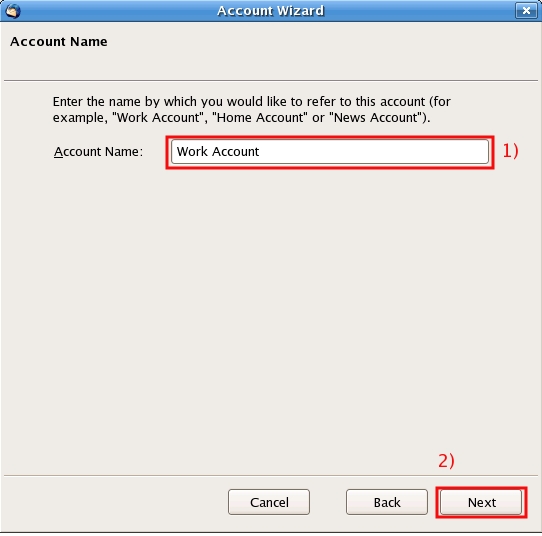
e) In the Account Wizard window, Account Name section:
- 1) in the Account Name field write the name by which you would like to refer to this thunderbird account (for example Work Account),
- 2) click on Next (on Continue for Mac).
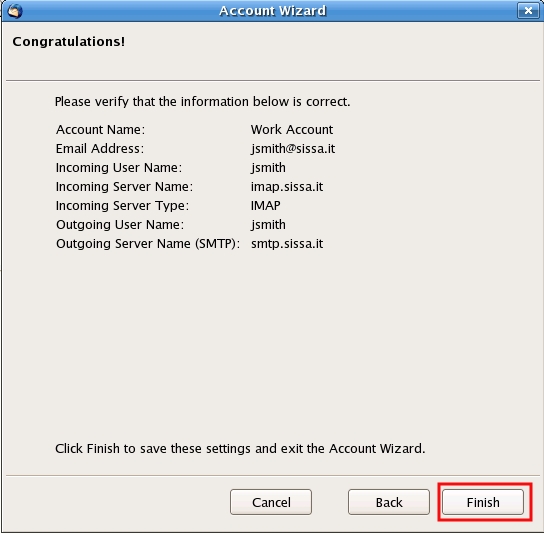
f) In the Account Wizard window, Congratulations! section, verify the information.
If it is all ok, click on Finish (on Done for Mac).
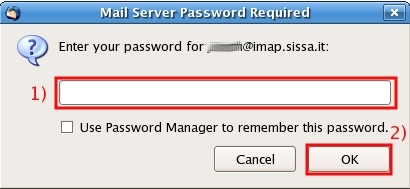
g) In the Mail Server Password Required window:
- 1) write your SISSA password,
- 2) click on OK
Last steps (configuring thunderbird (Linux, Windows, Mac and different thunderbird versions)
steps H J on Windows or Mac
H–on Windows or Mac) If your use thunderbird on Windows or Mac:
H–on Windows or Mac) On the main thunderbird window:
- 1) click on the Tools menu, in the top of the window,
- 2) then click on Account Settings.
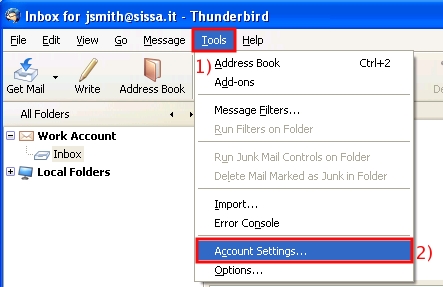
J–on Windows or Mac) In the Account Settings window, Work Account section, click on Server Settings.

STEP K (linux, windows, mac)
We show you two different types of window.
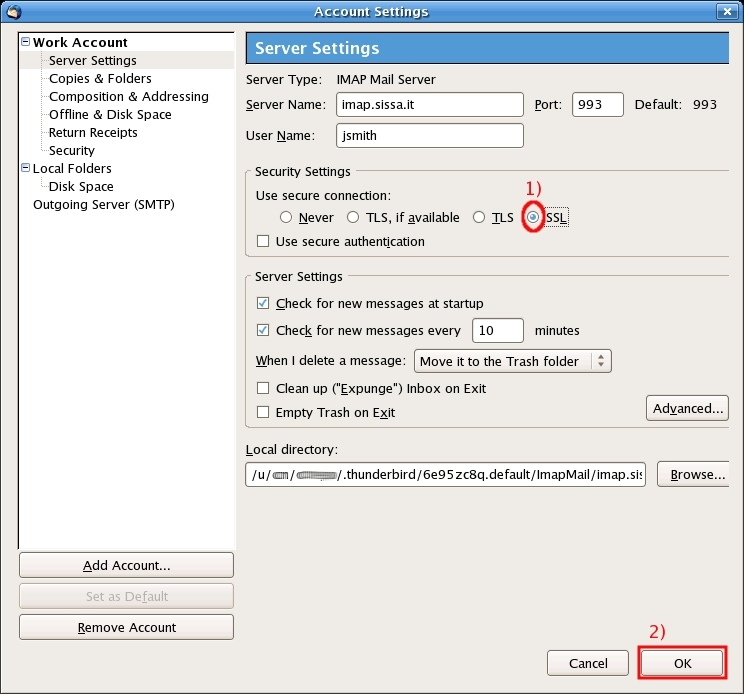
FIRST TYPE
In the Account Settings window, Server Settings section:
- 1) put a check in the SSL box,
- 2) then click on OK and now please go to GO TO THE STEP L.
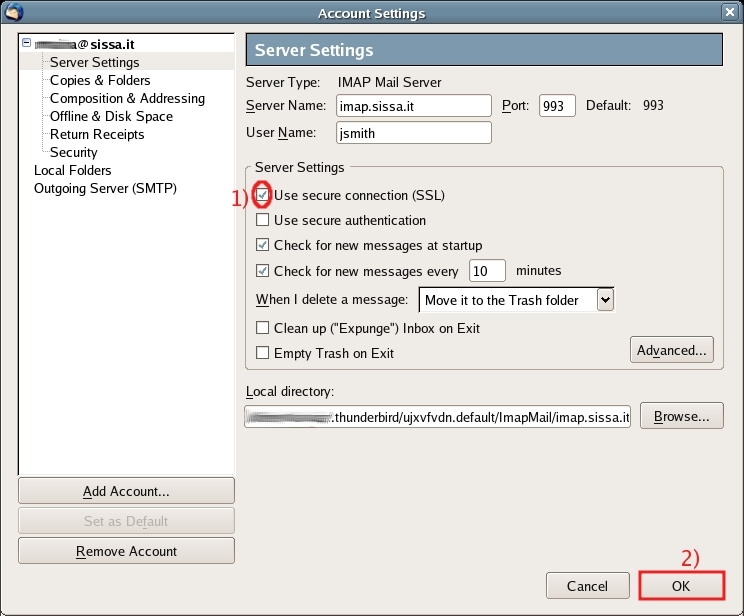
SECOND TYPE
In the Account Settings window, Server Settings section:
- 1) put a check in the Use secure connection (SSL) box,
- 2) then click on OK and now please go to GO TO THE STEP L.
STEP L (linux, windows, mac)
steps L M on Windows or Mac
L–on Windows or Mac) If your use thunderbird on Windows or Mac:
L–on Windows or Mac) On the main thunderbird window:
- 1) click on the Tools menu, in the top of the window,
- 2) then click on Account Settings.

M–on Windows or Mac) then in the Account Settings window, click on Outgoing Server (SMTP).

STEP N (linux, windows, mac)
- *DEPENDING OF THUNDERBIRD VERSION YOU CAN SEE DIFFERENTS Account Settings window, Outgoing Server (SMTP) section.
We show you two different types of window.
</note> == FIRST TYPE == In the Account Settings window, Outgoing Server (SMTP) Settings section,
* 1) Select the created Account (for example jsmith - smtp.sissa.it (Default))
* 2) then click on Edit….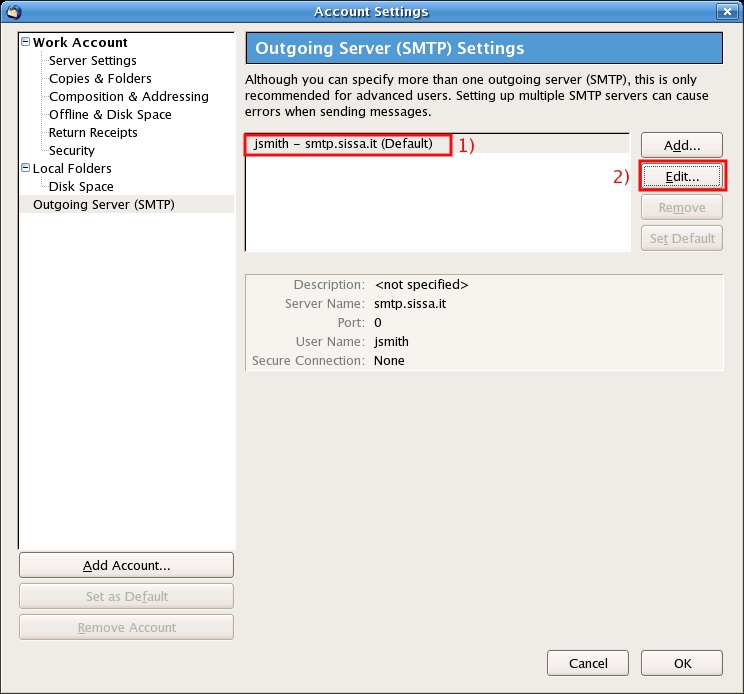
In the SMTP Server window:
* In the Settings section,
1) write a name in the Desription field (for example sissa smtp),
2) verify is written smtp.sissa.it in the Server Name field,
3) verify is written 25 in the Port field.
* In the Security and Authentication section,
4) if the Use Name and Password box is checked, click on it and deactivate it,
5) verify the NO box is active (put a check if it is necessary),
6) then click on OK.

—- ==SECOND TYPE== In the Account Settings window, Outgoing Server (SMTP) Settings section,
1) verify is written smtp.sissa.it in the Server Name field,
2) verify is written 25 in the Port field.
3) if the Use Name and Password box is checked, click on it and deactivate it,
4) verify the NO box is active (put a check if it is necessary),
5) then click on OK**.
- thunderbird/e-mail_clients/configuration.1238506706.txt.gz
- Last modified: 2009/03/31 16:05
- (external edit)

