This is an old revision of the document!
How to install and configure vnp client on your Windows XP
Before following this procedure please get VPNClient password visiting the VPN password page.
Due to security reasons, this page is readable outside the SISSA network inserting your SISSA username and your SISSA password. There are no restriction inside the SISSA network.
If you have any problem about vpn password, please contact helpesk service by phone or personally.
Click here to DOWNLOAD a VPN client software.
Installation Guide
a) Search for the downloaded file vpnclient-win-msi-…..exe icon and execute it (double click).

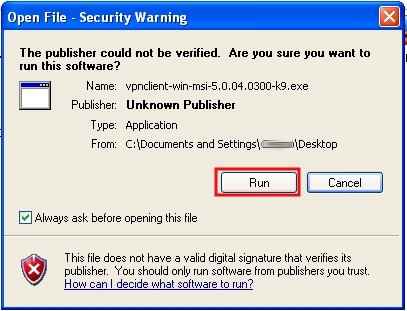
b) On the Open File - Security Warning window: click on Run.
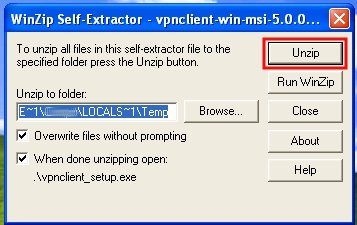
c) In the WinZip Self-Extractor window:
click on Unzip then …
click on OK.

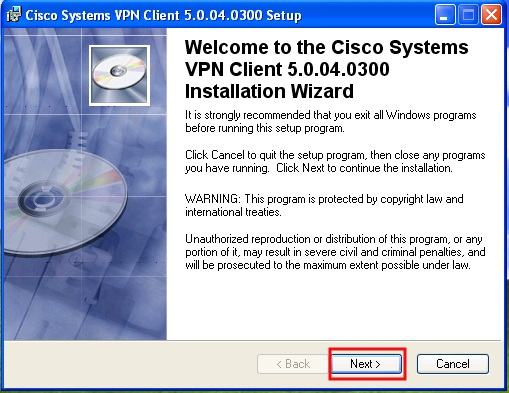
d) In the Cisco Systems VPN … Setup window:
click on Next.
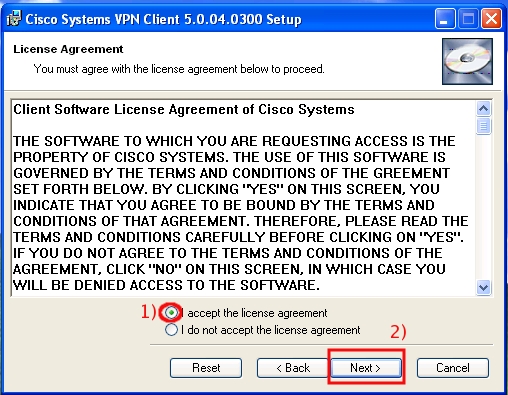
e) In the License Agreement window:
- 1) put a check in the accept the license agreement box;
- 2) click on Next.
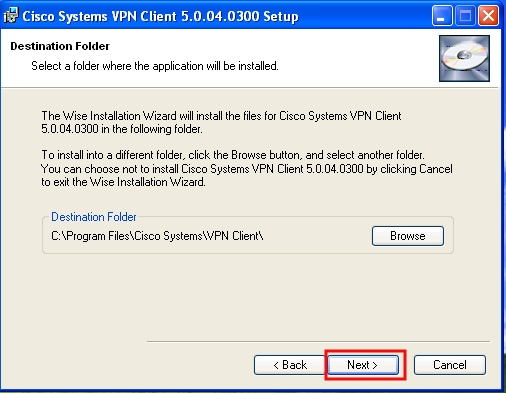
f) In the Destination Folder window:
click on Next.
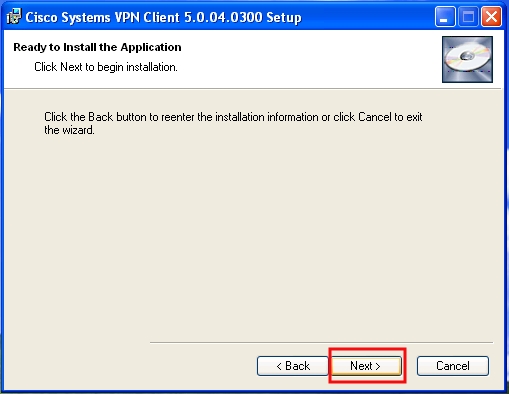
g) In the Ready to Install the Application window:
click on Next.
h) Please wait for the installation procedure ending.
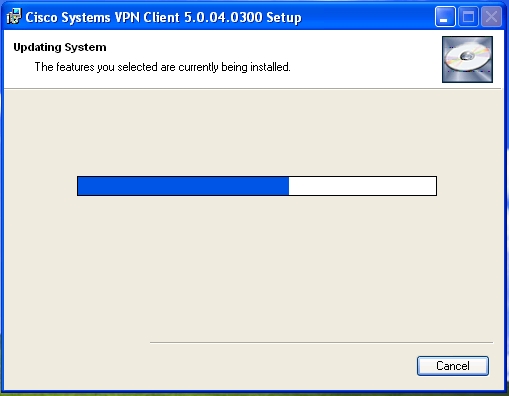
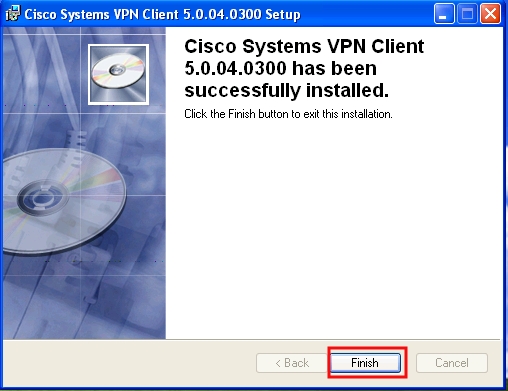
i) Click on Finish.
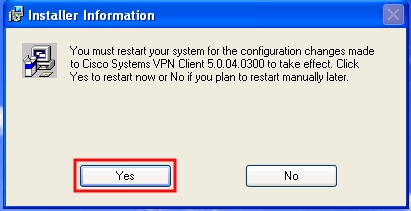
l) In the Installer Information window: click on Yes to restart the computer and accept the configuration changes.
Configuration Guide
a) To execute the VPN client:
- 1) click on the Start button;
- 2) click on All Programs;
- 3) click on Cisco Systems VPN Client;
- 4) click on VPN Client.
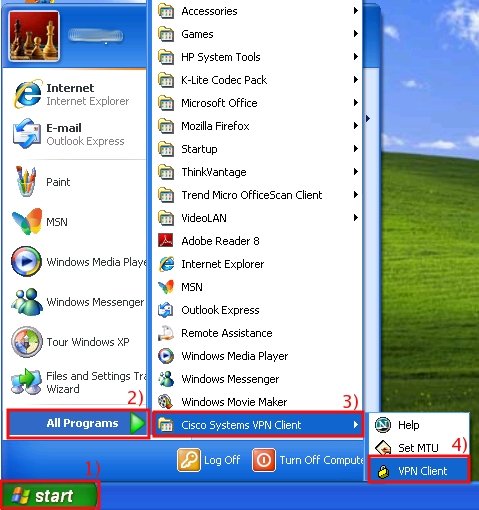
b) Please note: an open lock will appear in the toolbar next to the clock  .
.
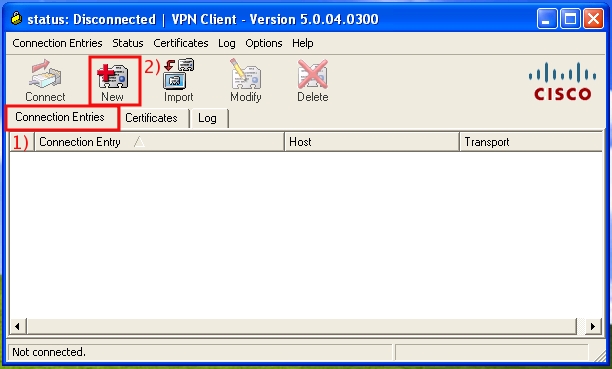
On the VPN Client window:
- 1) click on the Connections Entires tab;
- 2) then click on the New icon.
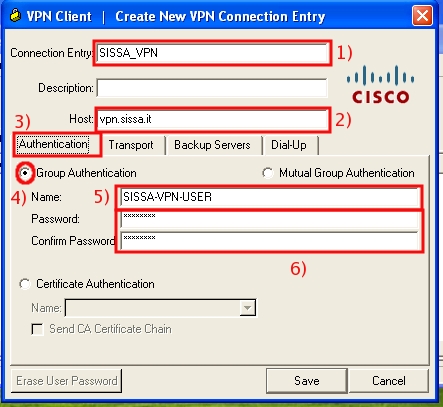
c) On VPN Client | Create New VPN Connection Entry window:
- 1) fill in the Connection entry field writing a name for the connection (for example SISSA_VPN);
- 2) fill the Host field writing vpn.sissa.it
- 3) click on the Authentication tab;
- 4) (in the Authentication tab) make sure that the Group Authentication box is checked;
- 5) make sure that in the Name field is written SISSA-VPN-USER
- 6) insert the vpn group password got on the VPN password page
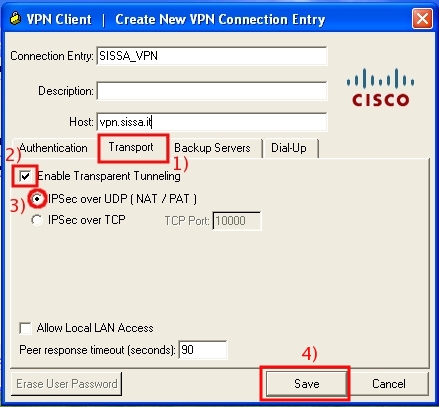
d) Always on the VPN Client| Create New VPN Connection Entry window:
- 1) click on the Transport tab;
- 2) make sure that the Enable Transparent Tunneling box is checked;
- 3) make sure that the IPSec over UDP (NAT/PAT) box is checked;
- 4) click on Save to save the settings and close the windows.
Connect to SISSA network using VPN Client
a) To execute the VPN client:
- 1) click on Start icon;
- 2) click on All Programs;
- 3) click on Cisco Systems VPN Client;
- 4) click on VPN Client.

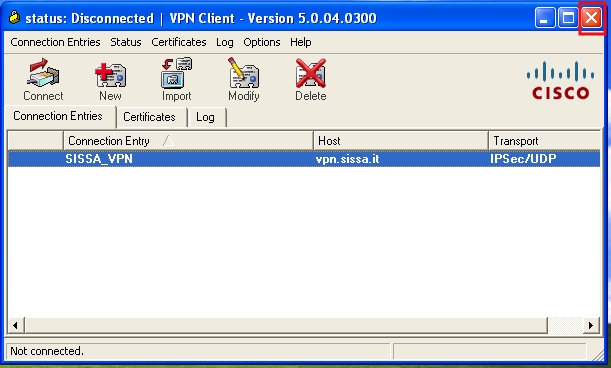
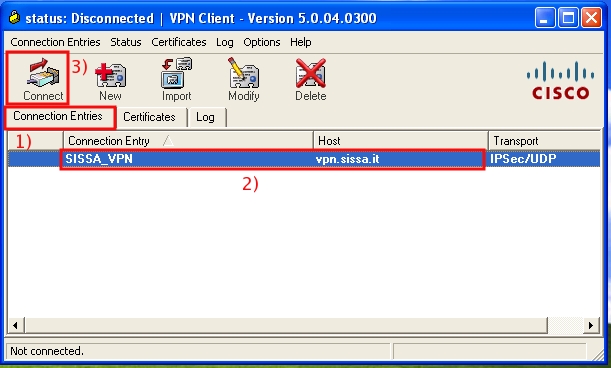
b) On the VPN Client window, note that  status: Disconnected will appear at the top of the window, then:
- 1) click on the Connections Entires tab;
- 2) select the connection entry with Host vpn.sissa.it;
- 3) click on the Connect icon.
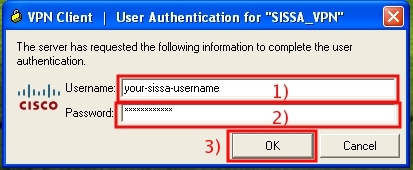
c) In the Authentication window:
- 1) insert your SISSA username
- 2) insert your SISSA password
- 3) click on OK.
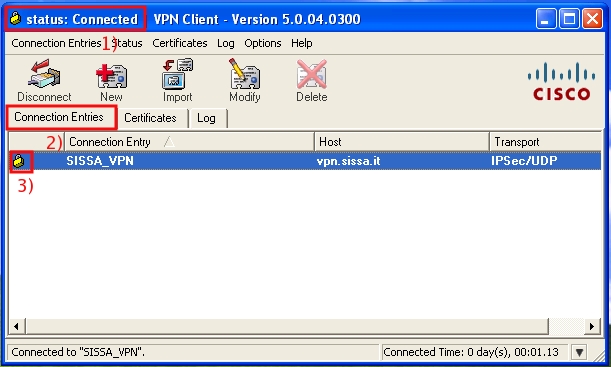
d) Note that a close lock will appear now in the toolbar next to the clock  and the VPN Client window may disappear, to reactivate it, do a double click on the close lock
On the VPN Client window:
- 2) click on the Connection Entries tab;
Now you are connected to the SISSA internal network.
To know how to open a connection to your linux SISSA workstation, please read the instruction on the page:
How to connect your laptop/pc to your SISSA workstation.
Please remember, when the VPN session is active, you will be able to act as a user connected in the internal SISSA network.
