This is an old revision of the document!
How to install and configure vpn client on your Windows Vista
Before following this procedure please get VPNClient password visiting the VPN password page.
Due to security reasons, this page is readable outside the SISSA network inserting your SISSA username and password (of the main cluster)— there are no restriction inside the SISSA network.
If you have any problem about vpn password, please contact helpesk service by phone or personally.
Installation Guide
a) Search for the downloaded file vpn-client-….-release.exe icon and execute it (Double click).

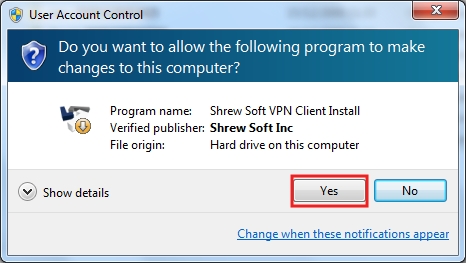
b) On the User Account Control window,
- to allow the installation process, click on Yes.
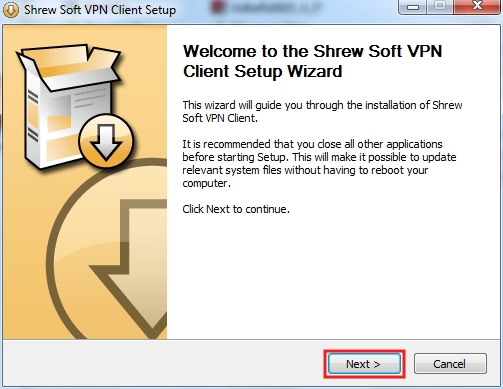
c) On the Shrew Soft VPN Client Setup window,
- click on Next.
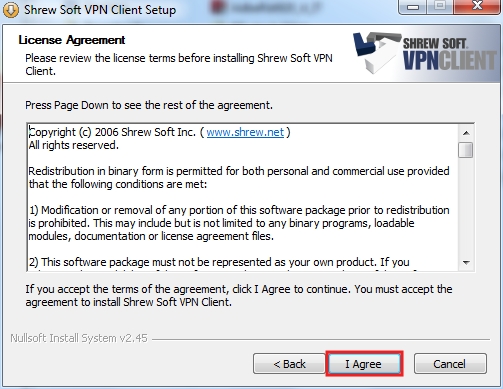
d) On the Shrew Soft VPN Client Setup window, Licence Agreement section,
- click on I Agree.
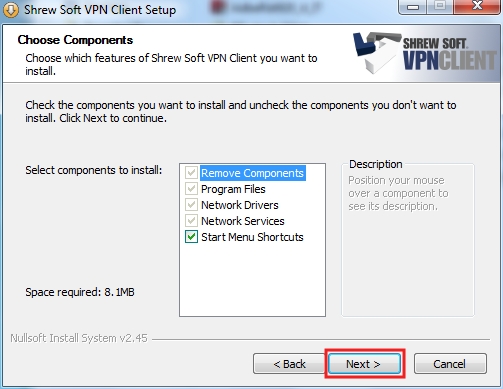
e) On the Shrew Soft VPN Client Setup window, Choose Components section,
- click on Next.
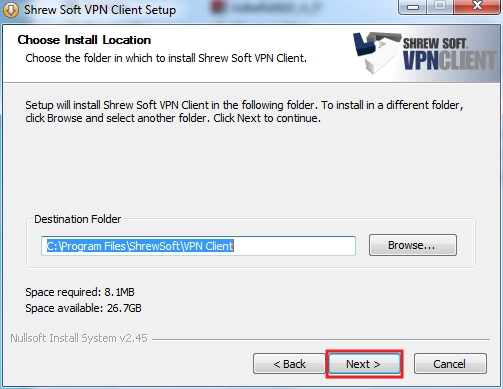
f) On the Shrew Soft VPN Client Setup window, Choose Install Location section,
- click on Next.
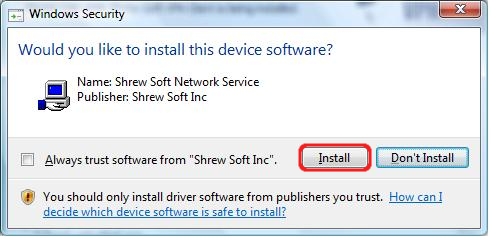
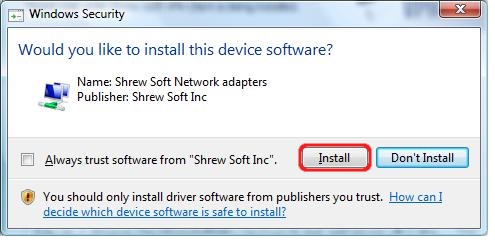
g) On the Windows Security window,
- click on Install.
h) On the Windows Security window,
- click on Install.
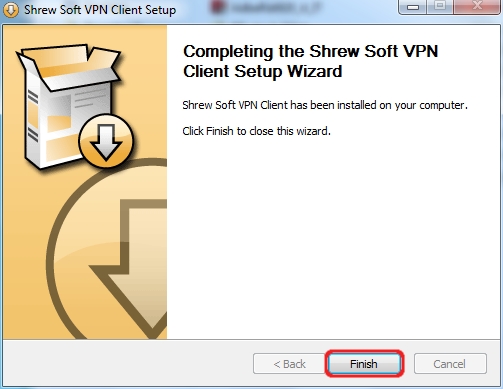
i) On the Shrew Soft VPN Client Setup window,
- click on Finish.
Configuration Guide
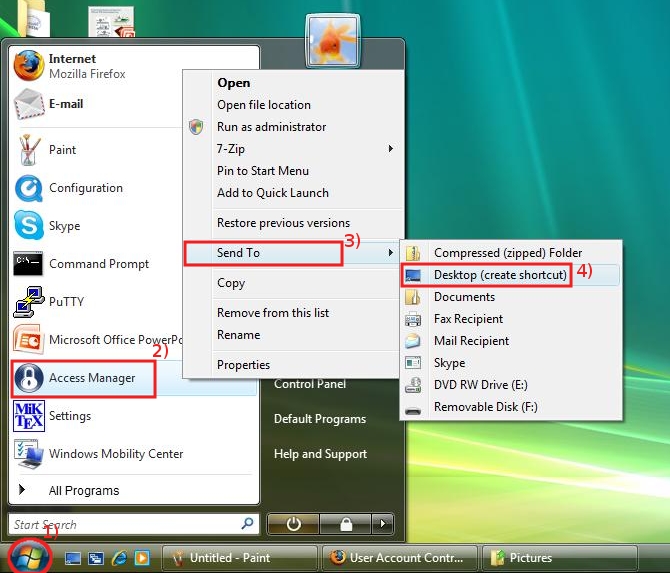
a) Put a shortcut of the Shrew Soft VPN Access Manager on your Desktop:
- 1) click on Start button,
- 2) using the right mouse button, click on the Access Manager program name which appears in the Programs list,
- 3) then click on Send To,
- 3) at the end select Desktop (create shortcut).
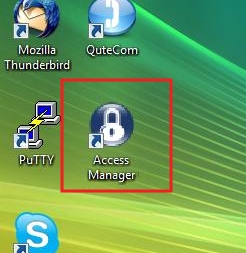
b) On your Desktop you will see the Access Manager icon, double click on it to start the Shrew Soft VPN Access Manager program.
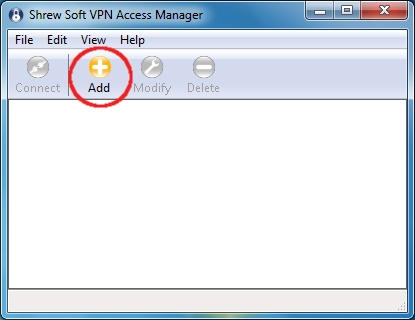
c) On the Shrew Soft VPN Access Manager window,
- click on Add.
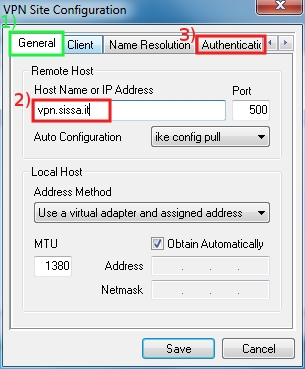
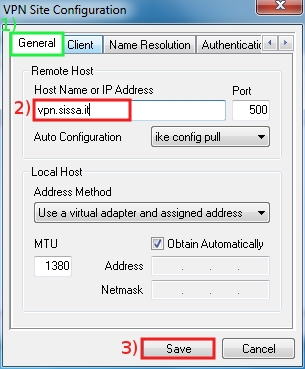
d) On the VPN Site Configuration window,
- 1) in the General tab,
- 2) in the Host Name or IP address field, write: vpn.sissa.it
- 3) then click on Authentication tab.
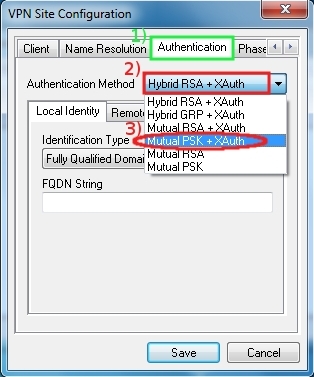
e) On the VPN Site Configuration window,
- 1) in the Authentication tab,
- 2) in the Authentication Method drop down list,
- 3)select Mutual PSK + XAuth.
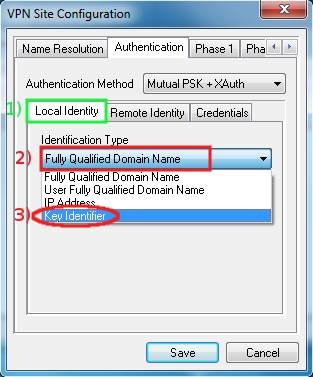
f) Always on the VPN Site Configuration window, Authentication tab,
- 1) in the Local Identity internal tab,
- 2) in the Identification Type drop down list,
- 3) select Key Identifier.
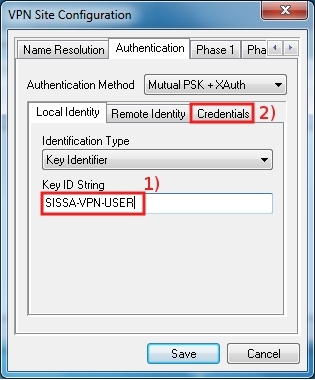
The content of the internal tab will change…
g)
- 1) … in the Key ID String field, write: SISSA-VPN-USER
- 2) then click on the Credentials internal tab.
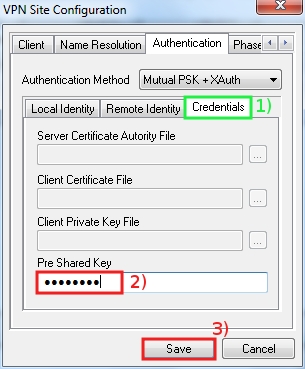
h) On the VPN Site Configuration window, Authentication tab,
- 1) in the Credentials internal tab,
- 2) in the Pre Shared Key field write: VPNClient password got on the VPN password page,
- 3) then click on Save.
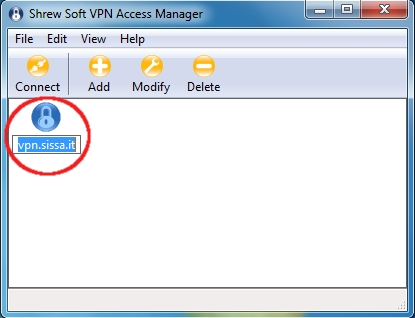
i) On the Shrew Soft VPN Access Manager window,
the program set automatically the name of VPN connection, you have to leave this name: vpn.sissa.it
To confirm it, press ENTER button.
If you are connected on the INTERNAL SISSA NETWORK, you can check the correct configuration of you VPN connection settings. The instruction are on SISSA internal test VPN connection section of this page.
Connect to SISSA VPN network using VPN Client
The VPN Client of you laptop can be used ONLY from an external network connection to SISSA VPN network.
a) On your Desktop you will see the Access Manager icon, doube click on it to start the Shrew Soft VPN Access Manager program.

b) On the Shrew Soft VPN Access Manager window,
- click on Connect.
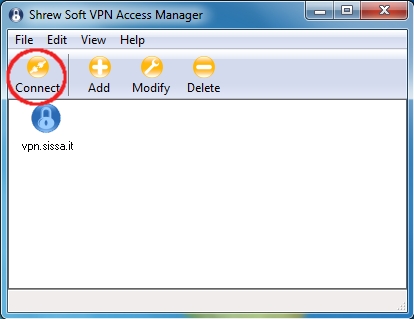
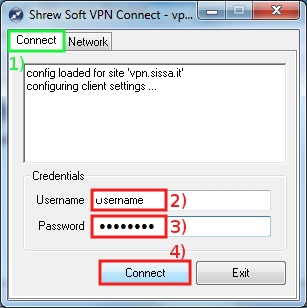
c) On the Shrew Soft VPN Connect window,
- 1) in the Connect tab,
- 2) write your SISSA username in the Username field and,
- 3) write your SISSA password in the Password field (the same of SISSA webmail),
- 4) then click on Connect.
d) On the VPN Gateway Login Banner window,
- click on OK.
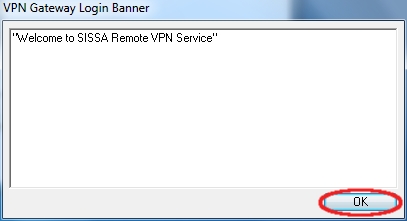
e) You are now connected to the SISSA Remote VPN service.
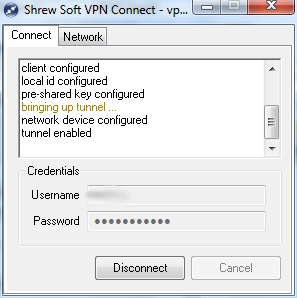
Disconnect from SISSA VPN network, close VPN client
To disconnect your laptop from the SISSA VPN network:
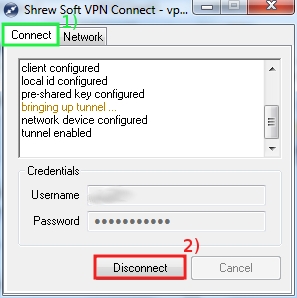
on the Shrew Soft VPN Connect window,
- 1) in the Connect tab,
- 2) click on Disconnect.
SISSA internal test VPN connection
How to check the correct configuration of your VPN connection, IF YOU ARE CONNECTED ON THE INTERNAL SISSA NETWORK
You can NOT execute the following test, if you are outside SISSA network.
Please remember to RESTORE the CORRECT PARAMETERS at the end of the test.
If you are connected on the SISSA internal network,
you can test the vpn configuration following these instructions:
a) On your Desktop you will see the Access Manager icon, double click on it to start the Shrew Soft VPN Access Manager program.

b) On the Shrew Soft VPN Access Manager window,
- click on Modify
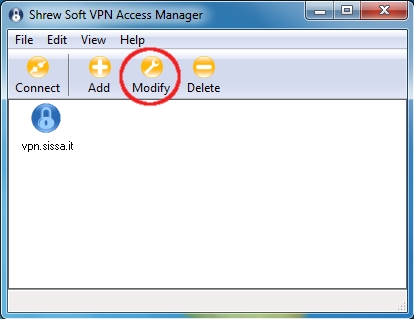
c) On the VPN Site Configuration window,
- 1) in the General tab,
- 2) on the Host Name or IP address field, write: 147.122.255.225
- 3) then click on Save.
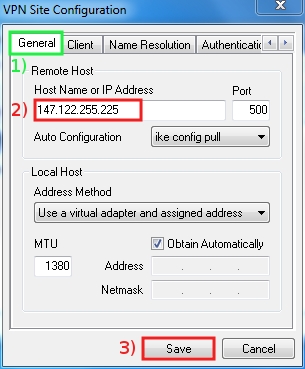
d) On the Shrew Soft VPN Access Manager window,
- click on Connect.

e) On the Shrew Soft VPN Connect window,
- 1) in the Connect tab,
- 2) write your SISSA username in the Username field and,
- 3) write your SISSA password in the Password field (the same of SISSA webmail),
- 4) then click on Connect.

f) On the VPN Gateway Login Banner window,
- click on OK

g) If your setting is correct, you will be connected to the SISSA Remote VPN service.

Now, you have to CLOSE the connection to the SISSA VPN network, and RESTORE the CORRECT PARAMETERS.
h) To disconnect your laptop from the SISSA VPN network:
on the Shrew Soft VPN Connect window,
- 1) in the Connect tab,
- 2) click on Disconnect.
TO RESTORE the CORRECT PARAMETER
i) double click on the Access Manager icon of the Desktop (to start the Shrew Soft VPN Access Manager program).

j) On the Shrew Soft VPN Access Manager window,
- click on Modify.

k) On the VPN Site Configuration window,
- 1) in the General tab,
- 2) on the Host Name or IP address field, write: vpn.sissa.it
- 3) then click on Save.
Now, you can close the Shrew Soft VPN Access Manager window.
Please read the instruction of the section: Connect to SISSA VPN network using VPN Client of this page to know how to use the VPN client from outside SISSA network.
