This is an old revision of the document!
Sissa e-mail services using Mail on Mac (leopard)
How to create a new account using Mail
a)
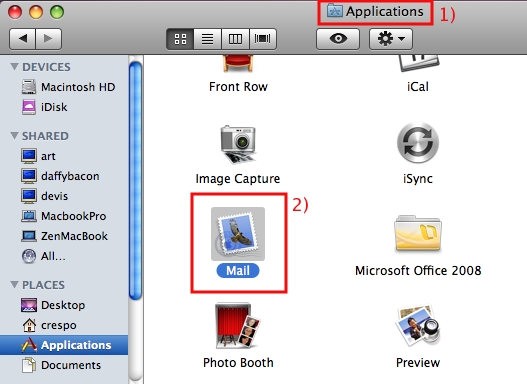
- 1) open the Applications folder,
- 2) search for the Mail icon and execute it (Double click),
If it is the first time you use Mail jump to Item d, otherwise start from item b).
b)
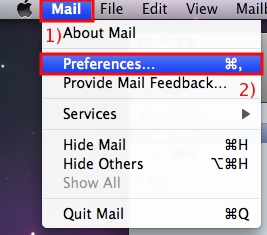
- 1) click on the Mail menu,
- 2) then click on Preferences.
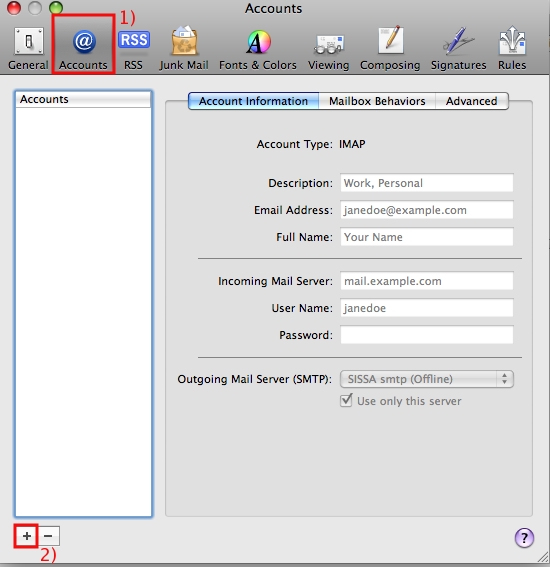
- 1) select the Accounts icon,
- 2) then click on the Plus (+) sign (on the left bottom of the window).
Item d
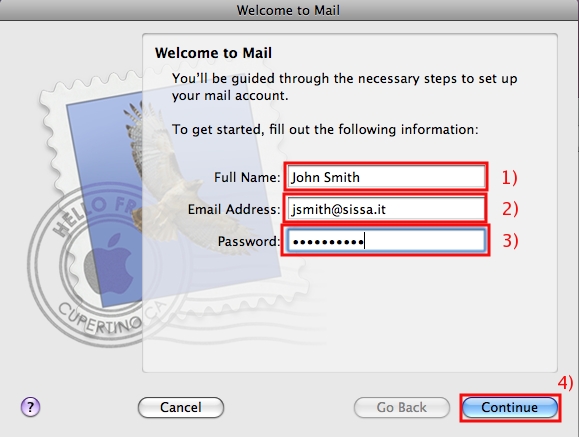
d) In the Welcome to Mail window, Welcome to Mail section:
- 1) In the Full name: field, write your name (for example John Smith),
- 2) In the Email Address: field, write your email address (for example jsmith@sissa.it),
- 3) in the Password: field write your sissa password,
- 4) at the end click on Continue.
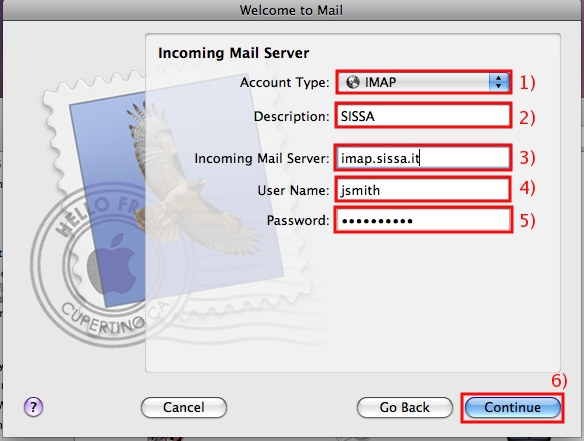
e) In the Welcome to Mail window, Incoming Mail Server section:
- 1) click on Account Type: drop down list, and select the IMAP option,
- 2) in the Description field write SISSA,
- 3) in the Incoming Mail server: field write imap.sissa.it,
- 4) in the field User name: automatically appears your sissa username,
- 5) in the field Password: automatically appears your sissa password,
- 6) at the end click on Continue.
If you are connected to internet jump to Item h, otherwise continue.
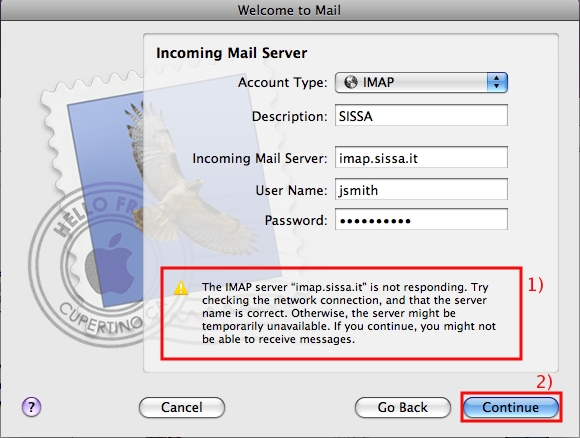
f) In the Welcome to Mail window, Incoming Mail Server section:
- 1) A warning message will appear in the window. Please ignore it,
- 2) then click on Continue.
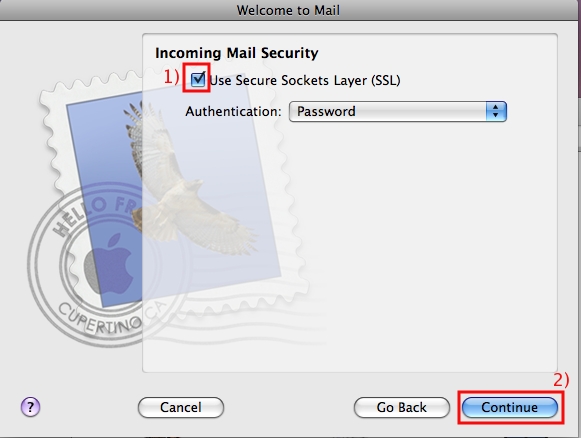
g) In the Welcome to Mail window, Incoming Mail Security section:
- 1) put a check in the Use Secure Sockets Layer (SSL) box,
- 2) then click on Continue.
Item h
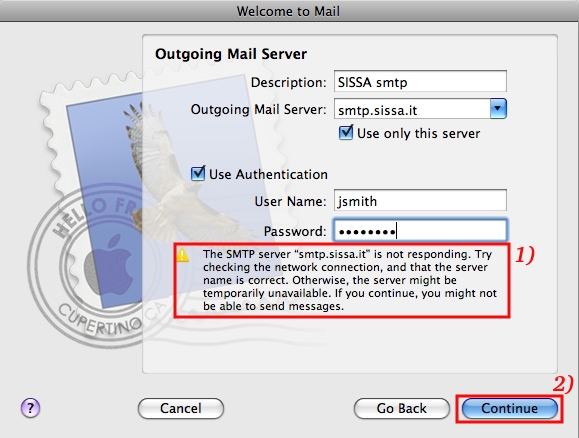
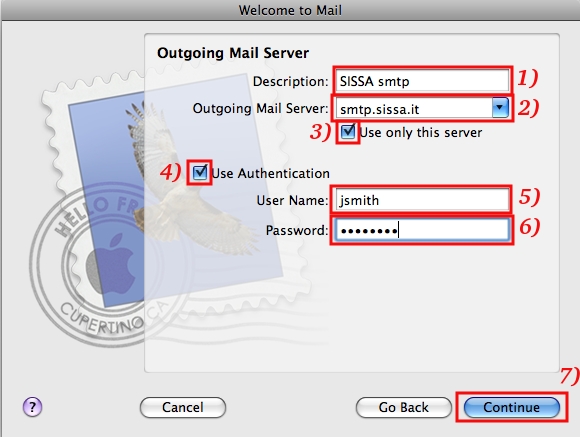
h) In the Welcome to Mail window, Outgoing Mail Server section:
- 1) in the Description: field write: SISSA smtp
- 2) in the Outgoing Mail server: field write: smtp.sissa.it
- 3) the Use only this server box have to be selected, put a check in this box if it is not present !!!,
- 4) put a check in the Use Authentication: box,
- 5) in the User name: field write your sissa username (for example jsmith),
- 6) in the Password: field write your sissa password,
- 7) then click on Continue.
If you are connected to internet jump to Item j, otherwise continue.
i) In the Welcome to Mail window, Outgoing Mail Server section:
- 1) a warning message will appear in the window. Please ignore it,
- 2) and click on Continue.
Item j
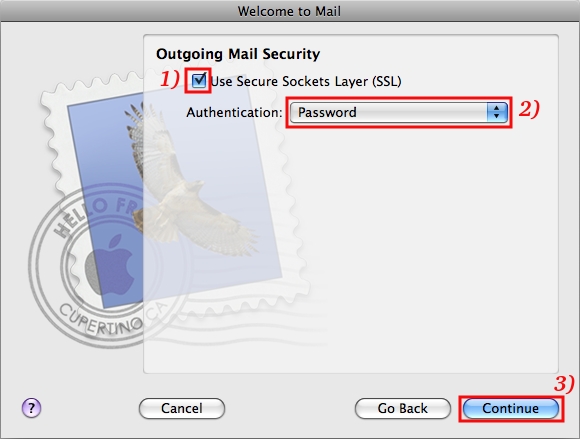
j) In the Welcome to Mail window, Outgoing Mail Server section:
- 1) put a check in the Use Secure Sockets Layer (SSL): box,
- 2) click on Authentication: drop down list, and select the Password option,
- 3) then click on Continue.
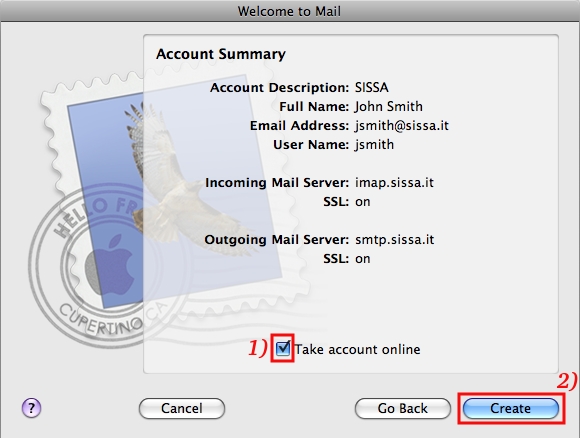
k) In the Welcome to Mail window, Account Summary section:
- 1) put a check in the Take account online: box (this box must be selected),
- 2) then click on Create.
Tips & Tricks
Save hard disk space
By default, Mail keeps copies of your messages for off line viewing, this fills some space of the hard disk. To save disk space, follow this steps.
Please note, after these operations you will not be able to read old mails when you are working off line.
a)
- 1) click on the Mail menu,
- 2) then click on Preferences.
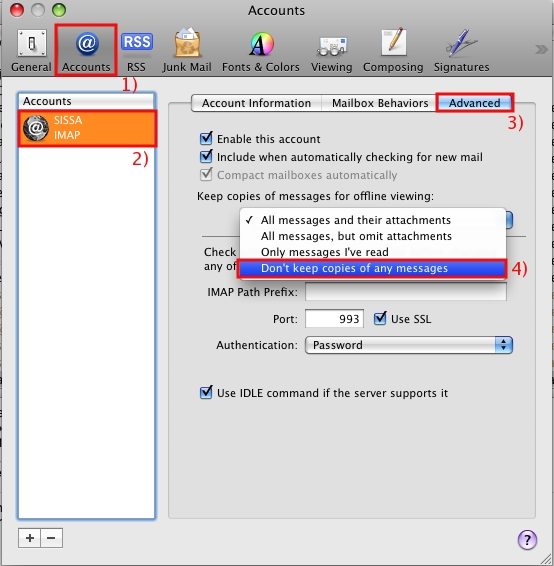
- 1) select the Accounts icon,
- 2) in the Accounts list (on the left of the window) select the Description name of the Sissa account (for example SISSA),
- 3) click on the Advanced tab.
- 4) in the keep copies of your messages for offline viewing: drop down list select Don't keep copies of any messages
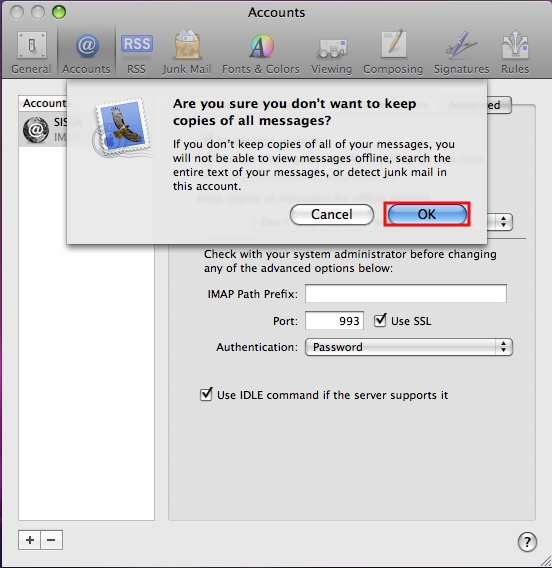
c) A message will appear asking for confirmation, click on OK.
d) Trying to close the Accounts window…. ![]() .
.
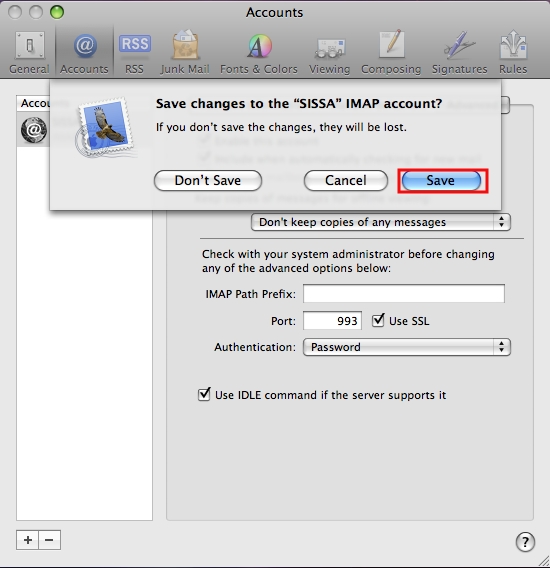
…a window will appear asking you to save the changes,
please click on Save (to save the settings and close the window).
