This is an old revision of the document!
Adding and sharing address books with SOGo web interface
With SOGo you can also share contacts information managing one or more address books.
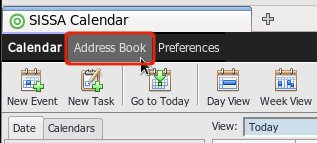
To access the address book section of the web interface click over the tab with the same name at the top of the window:
In this interface appear some different objects:
- Address books
- LDAP Directory Lists as public address books, for searching contact information of SISSA users
- A search textbox, at the top-right of the window
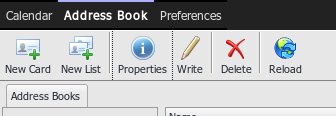
The main toolbar at the top of the window is dedicated to management of addressbook's cards.
This is a short description of every button:
- New Card: Add a new card to the selected address book
- Add List: Add a list to the selected address book
- Properties: Display and modify the selected address book card
- Write: Don't work (email part of SOGo is disabled)
- Delete: Delete the selected address book card
- Reload: Reload the address book view
Managing your address books
If you right-click on an addressbook item a menu with the possible commands appear:
- Properties: Set the name of the addressbook
- New Card: Create a new card in the addressbook
- New List: Create a new list in the addressbook
- Delete: Delete the addressbook
- Export Address Book…: Export the address book in LDIF format
- Import Cards: Import card in
vCardorLDIFformat - Sharing…: Share with other users or publish the addressbook
The three buttons at the top of this picture are dedicated to managements of the addressbooks:
Sharing an address book
You can share your addressbooks with other users using a procedure similar to the one used for calendar sharing.
Open the sharing properties window, right-clicking on the addressbook item and selecting “Sharing…” from the context menu:
You can add users to the sharing clicking on the button squared in red.
After that you can setup the ACLs for each user added, following this procedure:
- 1): Double-click on the user entry
- 2): Set the user's access rights
- 3): Click the “
Update” button to set the ACL and close the window
Accessing address books from external clients
You can access your address books from CardDAV compatible clients. A list of compatible clients is available on the webpage http://caldav.calconnect.org/implementations/clients.html .
You can access the default address book with the URL:
https://calendar.sissa.it/SOGo/dav/<USERNAME>/Contacts/personal/
If you create another calendar you can access with a URL that is related to a unique random code:
https://calendar.sissa.it/SOGo/dav/<USERNAME>/Contacts/<IDCODE>/
Substitute <USERNAME> with your username, or the username of the user that share the calendar.
Substiture <IDCODE> with the code displayed in the sharing properties of the address book, highlighted in the following figure:


