Windows Vista configuration guide
Configuration guide to the Sissa Wired Network (dot1x authentication), using the default tools and drivers of Microsoft Windows Vista.
PLEASE NOTE: DO NOT PLUG the NETWORK CABLE untill you reach the end of the STEP K of this procedure.
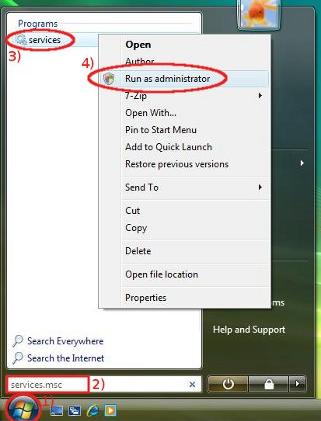
a) On the Desktop:
- 1) click on the Start button;
- 2) and then insert services.msc in search bar;
- 3) using the right mouse button click on services;
- 4) then select Run as administrator.
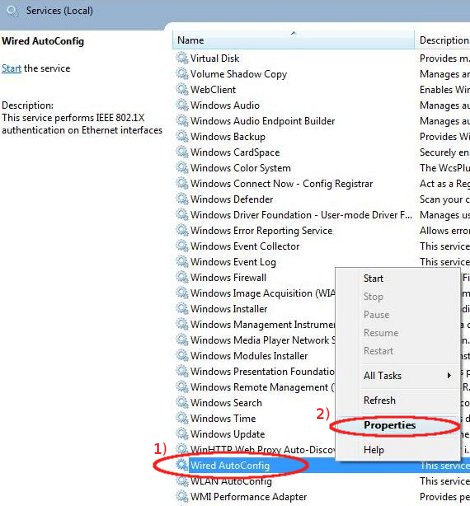
b) In Services window (in the following image there is a part only…):
- 1) look for Wired AutoConfig service (or Configurazione automatica reti cablate in Italian), click on it using the right mouse button;
- 2) and select Properties.
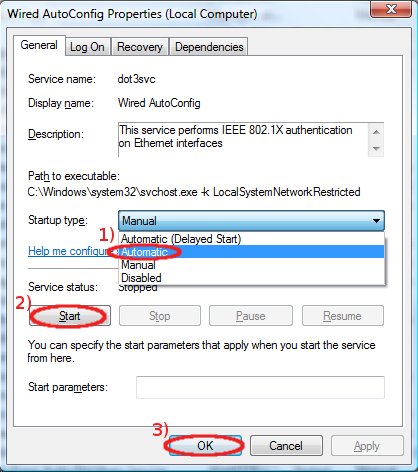
c) In the Wired AutoConfig Properties window:
- 1) in Startup type drop down list select Automatic;
- 2) in Service status field click on Start;
- 3) then click on OK button.
and close Services window.
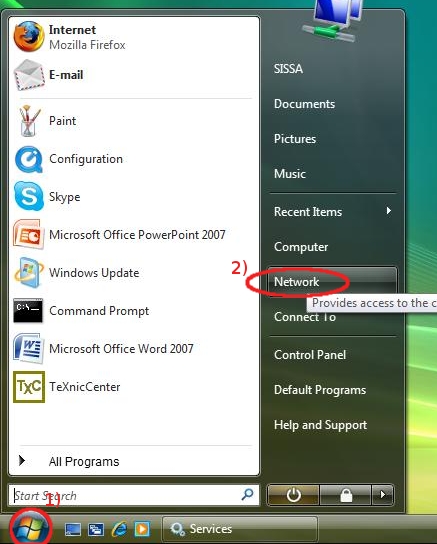
d) On the Desktop:
- 1) click on the Start button;
- 2) select Network.
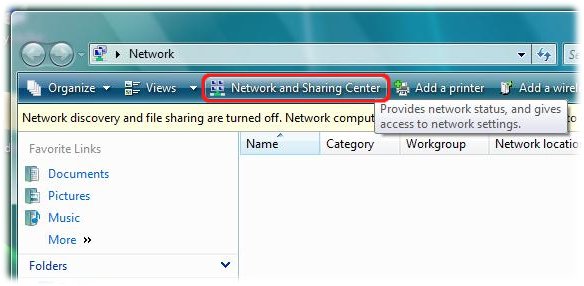
e) In the Network window:
click on Network and Sharing Center.
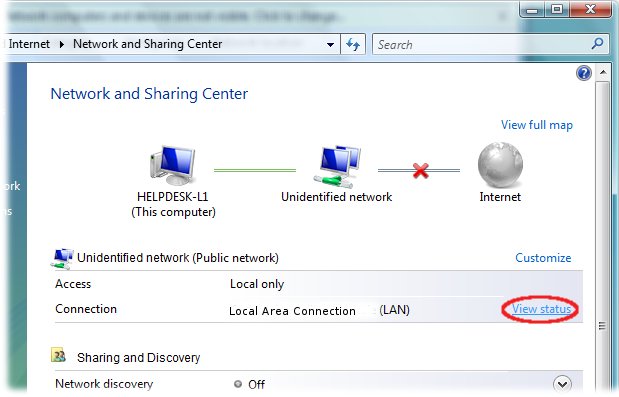
f) In the Network and Sharing Center window:
on the same line of Local Area Connection (LAN) click on View Status.
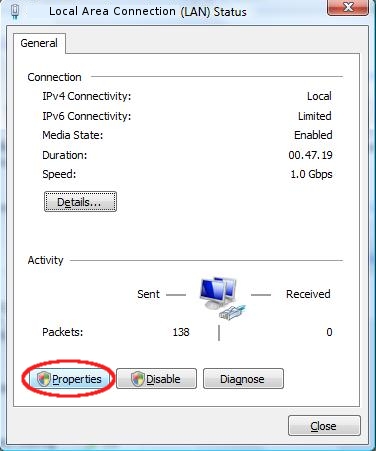
g) In Local Area Connection Status window:
click on Properties.
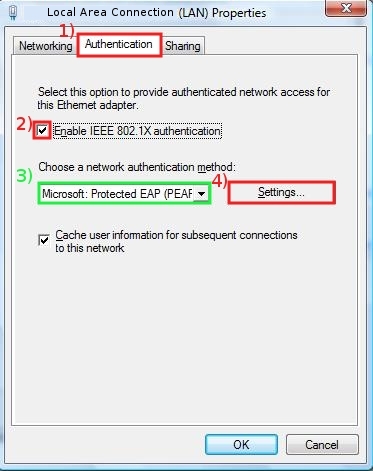
h) In Local Area Connection Properties window:
- 1) select Authentication tab;
- 2) put a check on Enable IEEE 802.1X authentication box;
- 3) verify that in Choose a network authentication method: field Protected EAP (PEAP) is selected;
- 4) then click on Settings.
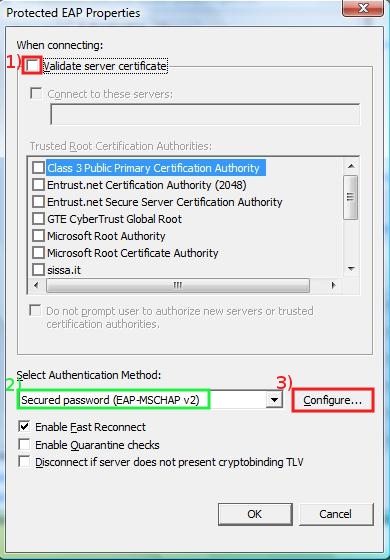
i) In Protected EAP Properties window:
- 1) remove the check in Validate server certificate box;
- 2) Verify that in Select Authentication Method: drop down list Secured password (EAP-MSCHAP v2) is selected;
- 3) Click on Configure….
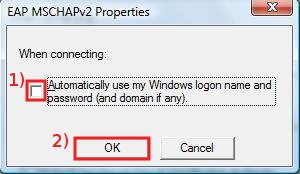
j) In EAP MSCHAPv2 Properties window:
- 1) remove the check in Automatically use my Windows logon name and password box;
- 2) then click OK here and on all window Properties (EAP MSCHAPv2 Properties, Protected EAP Properties, Local Area Connection Properties).
k) Connect the Ethernet cable then in the Notification area (bottom-right corner of the Desktop) will appear a pop-up window:
click on it in order to enter your credentials.

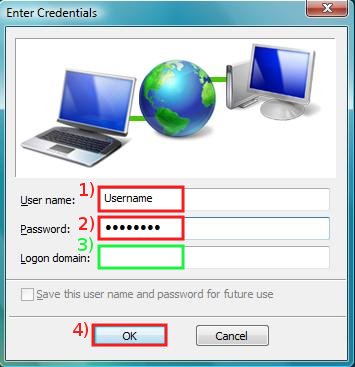
l) In Enter Credentials window:
- 1) insert your SISSA username
- 2) and insert your SISSA password
- 3) leave the Logon domain field empty;
- 4) then click OK.
