How to configure a Sissa network printer using Linux
If you need to substitute the configuration file of an already installed printer, you should remove the
old configuration file of this printer on your laptop. Please read the page:
How to uninstall an old Sissa network printer using Linux
a) Open an internet browser (for example Firefox),
go to the page:
https://printers.sissa.it
Then click on the download area
See the example:
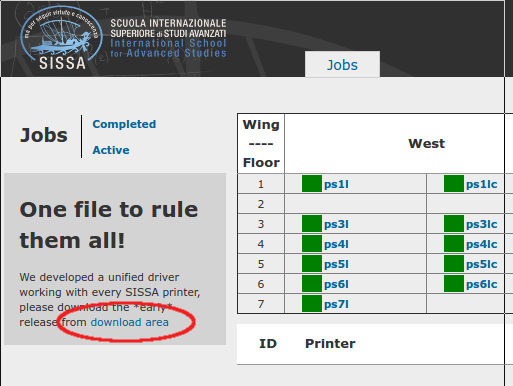
If you are using a browser which does not show you the line:
download area
you can download the ppd file from the address:
https://printers.sissa.it/drivers/SISSA-UnifiedDriver.ppd
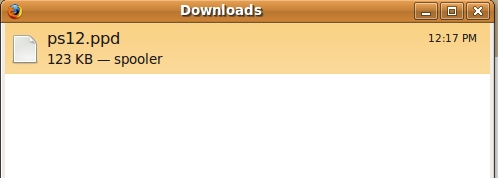
b) The file is generally saved by default in your-user-name/Desktop/
If you have changed your default Downloads directory, files will appear in the new location.
c) Open an internet browser (for example Firefox):
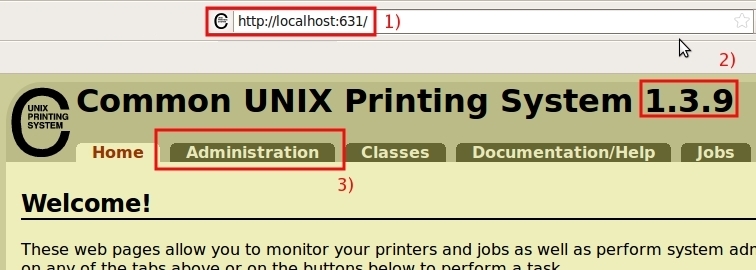
- 1) Go to the web page http://localhost:631/
- 2) please note that the number of the Printing System version is Not important, ignore it;
- 3) click on the Administration tab.
If this happens read the step “k)” below
d) In the Administration tab, in the Printers section, click on Add Printer.

e) In the Administration tab, in the Add New Printer section:
- 1) write the name of the printer you want to add (for example ps12);
- 2) then click on Continue.
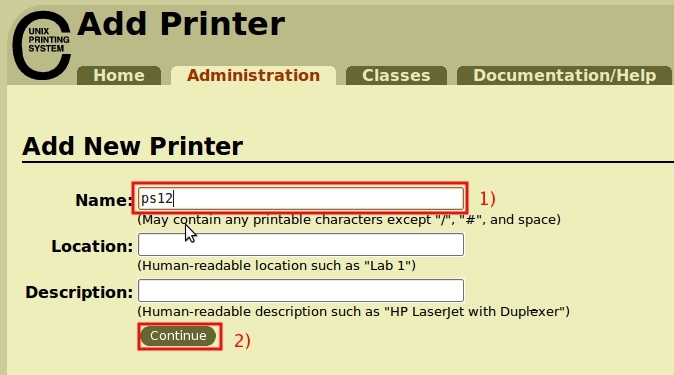
Please note: in the following sections you will always see ps12 – as the printer name chosen for this example.
If you have chosen another printer to install, the new printer name will appear instead of ps12.
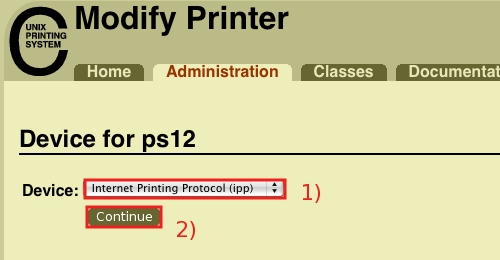
f) In the Administration tab, in the Device for ps12 section:
- 1) In the Device: drop down list select Internet Printing Protocol (ipp);
- 2) then click on Continue.
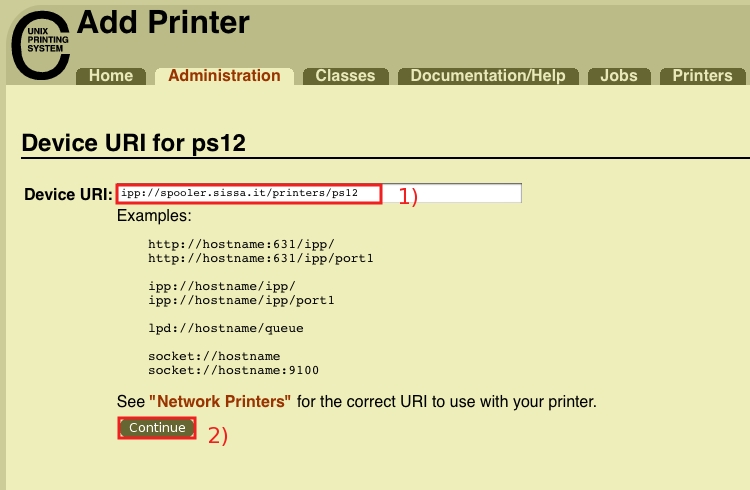
g) In the Administration tab, in the Device URL for ps12 section:
- 1) In the Device URL field write:
ipp://printers.sissa.it/printers/ps12
- 2) then click on Continue.
h) In the Administration tab, in the Make/Manufacturer for ps12 section, click on Browse.
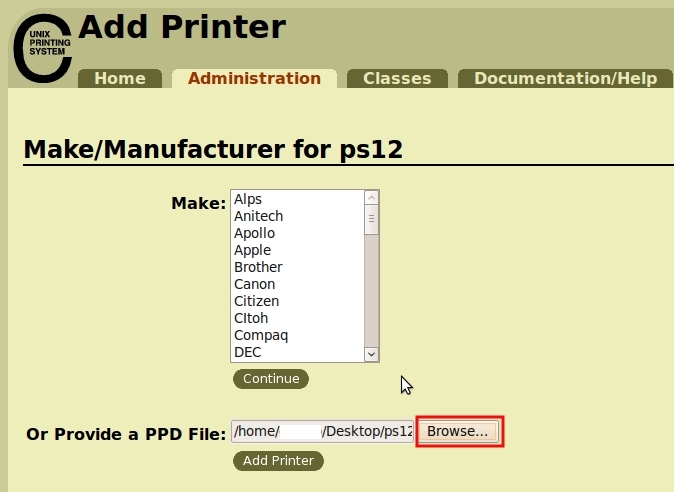
i)
- 1) Search for the downloaded printer description file (for example ps12.ppd) and select it;
- 2) then click on Open.
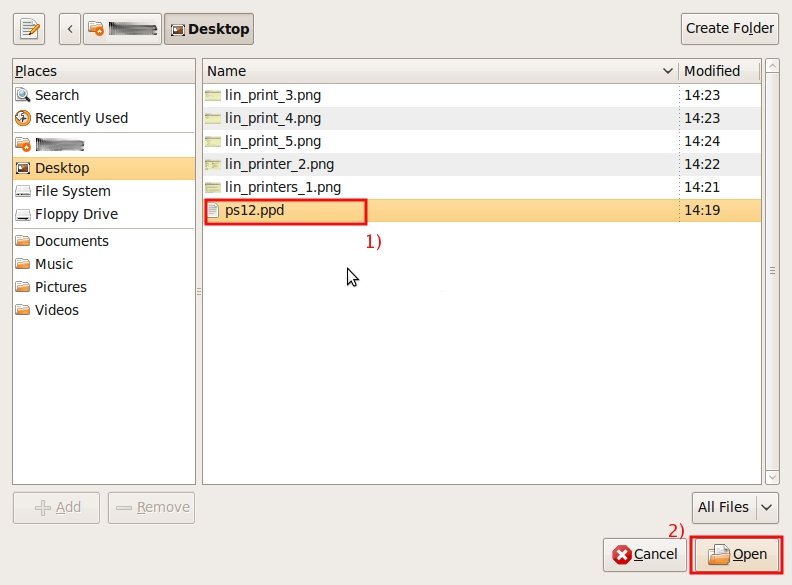
j) Remaining in the Administration tab, in the Make/Manufacturer for ps12 section, click on the Add Printer button.
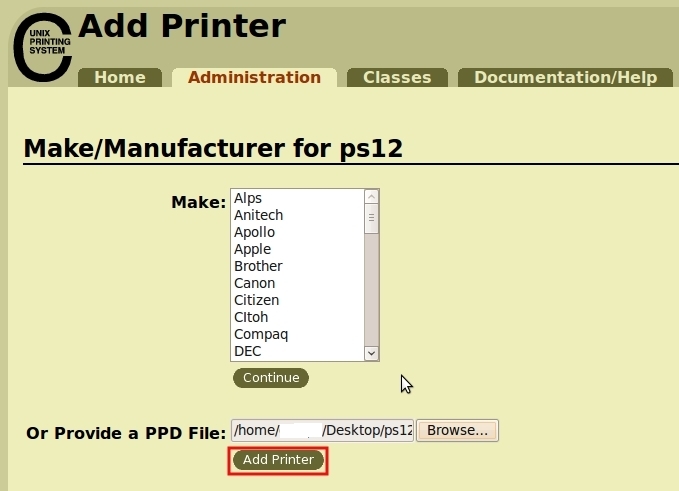
k)
- 1) write the administrator/root username with privileged permissions of your laptop in the User Name field;
- 2) write the privileged administrator/root password in the Password field;
- 3) click on OK to add the printer.
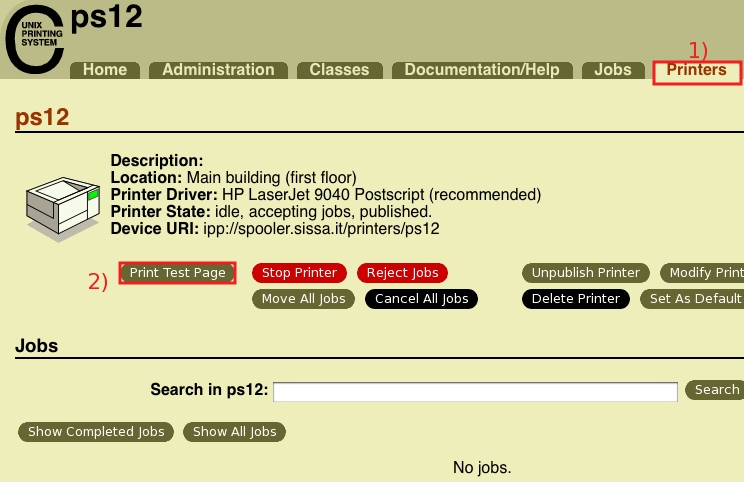
- 1) click on the Printers tab;
- 2) search for the Printer Properties button and click on it.
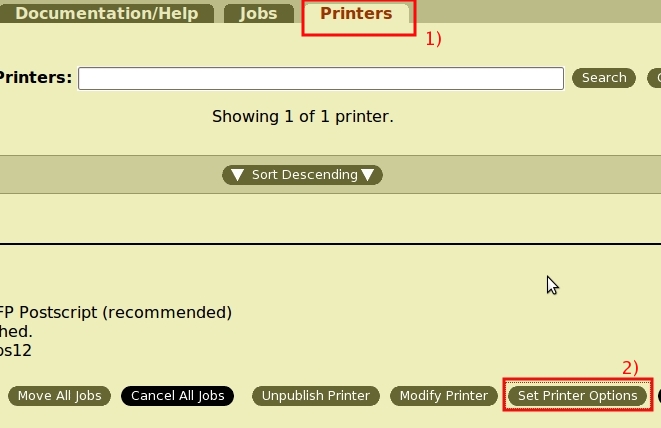
m) The window will change, the system will show you the Administrator tab with several printer property sections.
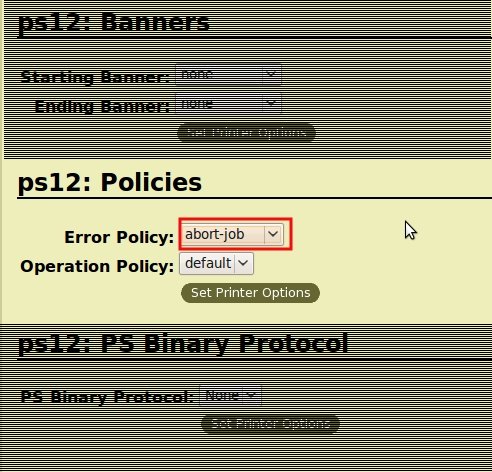
Move down the page and search for the ps12: Policies section…..
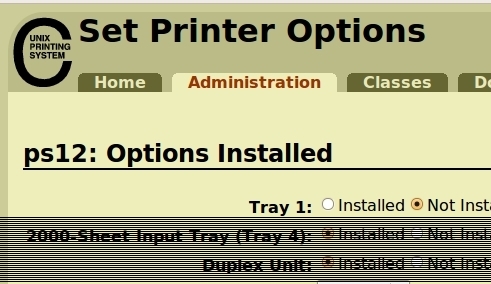
n) …. when you find the ps12: Policies section, select Abort Job in the Error Policy: drop down list.
